Plumbing

Backflow Prevention & Testing: What Every QLD Homeowner Should Know

You’ve probably received a notice about backflow testing or noticed a small valve near your water metre without thinking much of it. After all, your tap water looks clean and safe – so it’s easy to assume everything is working as it should. But when your home has a swimming pool, a rainwater tank, or an irrigation system, there are situations where water from those systems, carrying bacteria, dirt, and chemicals, can flow backwards into the main water line and contaminate your supply.  That’s why that valve is there – it’s a backflow prevention device, and it’s designed to stop that from happening. But it can only protect you if it’s working properly, which is why regular testing is needed. In this guide, we’ll walk you through how backflow testing works, how often you need it, and what can happen if it’s ignored. TL;DR What Backflow Testing Actually Means Backflow testing is a professional check to make sure your backflow prevention device is doing its job properly: stopping contaminated water from getting into your clean, drinking water supply. Under normal circumstances, the flow of water is in one direction. Water moves from high pressure in the council water main (in the street) through your water metre into your house, which has lower pressure.  Sometimes, though, this process reverses. If the pressure in your home increases (higher than the street’s) or the pressure in the street decreases dramatically, the flow can reverse, and water moves from your house pipes into the street’s pipes.  To prevent this situation, a backflow prevention device is installed on your property (often near the water metre or at the points of connection for irrigation or tanks). It has a one-way check valve that allows water to flow in one direction only and automatically closes if the direction of flow is reversed. Unfortunately, in Townsville, the hard water contains minerals, which can gradually build up inside the components within your backflow device. With the buildup of minerals, the components stick together or start wearing out, and eventually, the valve in the backflow device will not seal correctly. If the backflow device fails to close when flow is reversed, it won’t be able to prevent polluted water from contaminating the mains supply, letting bacteria and chemicals enter your drinking water and causing serious health problems. That is why backflow testing is very important, as it verifies that your device correctly responds and closes off to the reversal of water flow. Does Backflow Testing Apply to Your Home in Queensland? Backflow testing only applies to your home if you have a testable device installed. In Queensland, these devices are mandatory if your property has medium- to high-risk water setups, like: How Often Is Backflow Testing Required in QLD In Queensland, backflow testing must be carried out once a year.  The Townsville City Council keeps a database, or a backflow register, of all of the properties in the city with a testable device. Each year, they send you – the registered person – an invoice for your annual registration fee or a renewal notice. Once you get the notice, it’s your responsibility to make sure that the device gets tested by the end of the calendar year (31st December) and the fee is paid. Who Can Legally Perform the Test? In Queensland, only a plumber who meets the requirements below can perform the test: Now, to know for sure that you’re choosing a qualified professional, just ask them, “Do you have a backflow endorsement, and is your test kit currently in calibration?” An expert will happily present their QBCC card, which shows ‘Backflow Prevention’ under ‘endorsements’ on the back. Alternatively, you can quickly verify their credentials yourself on the QBCC Licensee Register online. All you need is their name or licence number to access their full details and ensure their status is active. What Happens During The Appointment The backflow appointment normally takes 30 to 45 minutes. Here’s a breakdown of what happens during that time: Along with the completed Form 9, you pay the lodgement fee to the Council to ensure that your device remains registered for the rest of the year. What If The Backflow Device Fails? By Queensland law, if your backflow device fails, you have to get it repaired or replaced immediately. Most of the failures happen for small things, like a dried-out rubber seal or a bit of grit getting stuck in the valve. Your plumber will open the device, give it a good clean, and replace any worn-out rubber parts. Once the repair is done, the plumber will test the device again. If your device passes the test this time, they will fill out a Form 9 to give to the Townsville City Council as your official “Pass” notice and note that your device was serviced to get it working properly again. But sometimes, your backflow device is too old, or the metal itself is too corroded for repair. If that’s the case, a whole new backflow prevention device will have to be installed, and the new system will be tested. In this situation, your plumber submits two separate forms: Very rarely, a plumber might not be able to repair your device on the spot if they don’t have a spare part or can’t find a suitable replacement. In such a case, they cannot leave your water system at risk. They’ll disconnect your water supply to the hazard appliance (like an irrigation system or pool) by turning off the valve to those appliances while leaving the rest of your house connected to the main supply, so you can carry out your daily activities until they return with the part. Can a Backflow Prevention Device Be Removed Instead? The short answer is yes, but only if the reason it was installed in the first place is gone.  If you’ve made changes to your plumbing that remove the original risk – like getting rid of a pool, switching from automatic sprinklers to a simple garden
Hot Water System

What Size Hot-Water System Do I Need?

If you’re trying to work out what size hot water system to buy, you’re probably hoping for a quick answer like “2 people = this size” or “4 people = that size”. But it’s not that simple. Headcount gives you a good starting point, but what really matters is how your home uses hot water at its busiest times.  Two people taking long, back-to-back showers can easily use more hot water than a family of four who take shorter showers and space out their usage instead of running everything at once. That’s why sizing is not just about numbers but also about your routine and a bunch of other things we’ll walk you through in this guide. It’ll help you choose a system that actually works for your home without running out or being oversized. TL;DR How Hot Water System Sizing Differs (By System Type) Storage Systems Storage systems heat water and keep it in a tank, so these systems are sized in litres (L) and come in a wide range of sizes – from small 25L units for single-point use (like a single tap) to large 400L+ systems designed for full family homes. The number tells you how much hot water is available in storage at one time before the system needs to recover. Continuous Flow Systems (Instantaneous Systems) In continuous flow systems, since there is no tank and the system heats water as it passes through the unit, they can’t be sized based on a litre capacity; instead, they are sized by flow rate in litres per minute (L/min).  Continuous flow systems usually range from 12 L/min to 32 L/min+. This number shows how much hot water the system can deliver at one time, which determines how many showers or taps can run together without losing temperature or pressure. Now that you understand how sizing works differently for each system, you can apply the right method to the system you’re installing in your home and work out the correct size from there.  The Main Factors That Determine What Size Hot Water System You Need Number of People In The Household The number of people living in your home is the starting point for understanding your hot water use, as more people means more showers, dishwashing, laundry, etc., which all add up quickly. In Australia, one person uses about 50 litres of hot water per day. Based on this per-person usage and the number of people in your house, you can calculate your family usage and the size of your storage tank.  For instance, if you have a family of four, 4 people × 50 L each = 200 litres of hot water usage. Now, since your family uses around 200 litres a day, it might seem logical to go for a 200L tank, but please don’t. Because, for instance, in real life, someone might take a longer shower, or there might be an extra load of laundry to do, which can increase your family’s usage from the calculated value and empty the tank earlier. That’s why you always add a buffer of around 50–100 litres, so you don’t run out of hot water.  For a continuous flow system, the number of people doesn’t directly decide the size because it heats water as you use it, not based on how much is used overall in a day. But it still helps you understand the overall system size. For instance, more people mean a higher chance of multiple showers or taps running at the same time, which pushes you towards a higher flow rate system. Peak-Time Hot Water Usage Peak time is the busiest hour in your day – usually the morning before school or work, or the evening after sports and daily routines – when most hot water is being used at the same time. In a storage system, the tank needs to hold enough hot water to cover everything used during this peak window.  To calculate this peak usage, look only at your busiest 60 minutes and add them up. Now imagine most of this happening in the same hour. For example, in a typical family morning: That already puts you at around 200+ litres in one peak hour, without even adding anything extra like taking longer showers. So, for extra usage, step up to a safe working range by choosing a tank size 20–30% larger than the calculated peak demand.  If you are sizing a continuous flow system, you need to find the litres per minute (L/min) that will be enough to supply all running fixtures during peak time. Now, for the same example, let’s calculate the litres per minute (L/min) required: So total simultaneous demand becomes 29 L/min.  But just like with a storage system, you should always add around a 2–5 L/min margin to your calculated peak load to cover unexpected usage.  Number of Bathrooms/Showers In Australia, around 80% of people shower daily, so showers are the biggest and most regular use of hot water in most homes. In a storage system, the number of bathrooms affects how quickly the tank will be empty because more bathrooms mean more chances of multiple showers running at the same time (higher simultaneous use), which creates a faster drain on the tank, so you need a bigger tank.  For calculation, you can use this formula:  (Number of Showers) x (9 L/min average shower flow rate) x (average shower time) For example, if you have a 2-bathroom home and two people take a 10-minute shower each, the calculation looks like this: 2 showers × 9 L/min × 10 minutes = 180 litres That means in just 10 minutes, you can use around 180 litres of hot water. If you only have a 160L tank, it will run out before both showers are finished. That’s why you always add a buffer of 50–100 litres, so the system can comfortably handle the showers and any other hot water use happening at the same time without running short.  With continuous flow

Plumbing

How to Unblock a Toilet: Safe DIY Methods & When to Call a Plumber

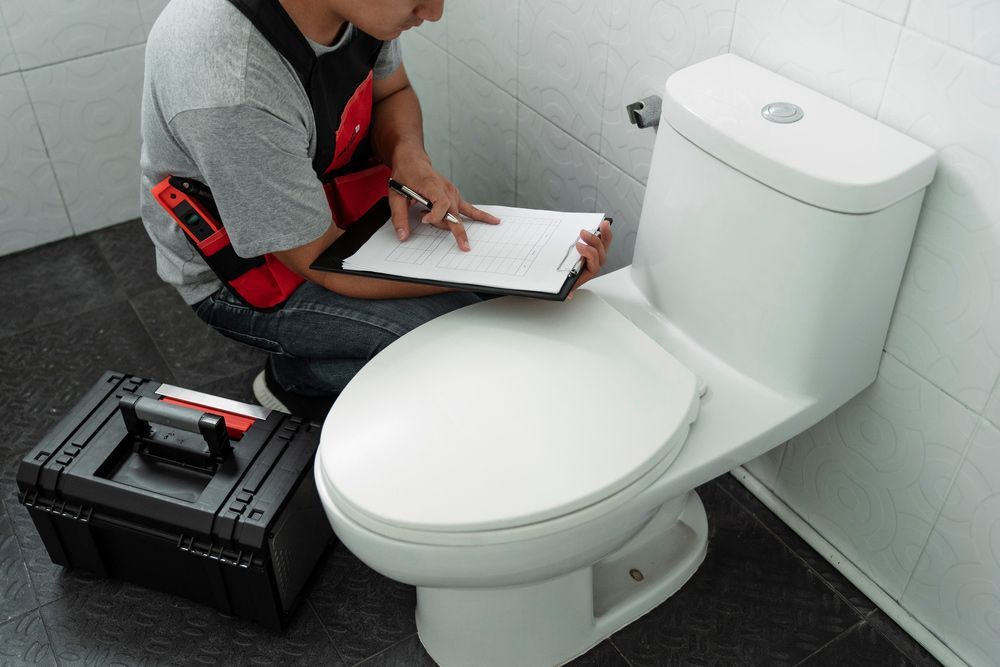
You flush the toilet, the water rises instead of going down, and suddenly, a simple bathroom trip gets messy and stressful. Most of the time, it’s too much toilet paper or a small clog in the bend of the toilet, blocking water from flowing properly.  The good news is you can clear out these minor blockages using a few safe DIY methods. But first, you must understand what type of blockage you’re dealing with, so you don’t waste time on the wrong fix. In this guide, we’ll walk you through exactly what to do right away, how to unblock a toilet using simple methods, and the clear signs that tell you when it’s no longer a DIY job and you need a licensed plumber. TL;DR First: Stop the Toilet From Overflowing The float controls the fill valve. As the tank fills, the float rises, and once it reaches a set height, it shuts off the water supply. If the water is still running, gently lift the float as high as it will go and hold it there. This forces the valve to close and stops more water from entering the tank. Understand What Kind of Blockage You’re Dealing With Before you try to fix anything, figure out what kind of blockage it is. This tells you how serious it is and whether you can handle it yourself or need an expert. Most toilet blockages fall into two types: 1. Simple Clogs A simple clog means the blockage is stuck inside the toilet itself, usually in the S-bend (the curved part inside the base of the toilet). This bend holds a bit of water to stop sewer smells from coming back into your bathroom, but because it’s narrow and curved, it’s the easiest place for things to get stuck. Clogs happen because of: How to spot a simple clog: Because the issue is in the toilet, you can fix it yourself using basic tools. 2. Deep Blockages  A deep blockage means the problem is further down in your home’s drainage system, usually in the main sewer line that carries waste out of your house. Deep blockages happen because of: How to spot a deep blockage: If you notice these signs, this isn’t something you can fix yourself because the issue is deep in the system and out of your reach. Also, under Queensland regulations, any work on sewer pipes must be carried out by a licensed plumber. DIY Methods to Unblock a Toilet If you’ve worked out that it’s a simple clog, you can clear it yourself using the methods below. Method 1: Use a Toilet Plunger the Right Way A plunger is the most effective way to clear a toilet blockage, but it only works if you use the right type to create a tight seal.  Always use a flange plunger and not a flat plunger when unblocking a toilet. A flat plunger, as the name says, has a flat base designed for surfaces like basins and sinks, so it will not sit and seal properly in the round and recessed toilet opening. A flange plunger is made specifically for toilets. It has a soft rubber cup with an extra fold underneath that sits slightly inside the toilet opening to cover it completely and form a tight seal around the hole, so you can build enough pressure to move the blockage. How to use it: Method 2: Use a Toilet Auger for Stubborn Clogs If the plunger doesn’t work, the clog is likely deeper or more solid, so use a toilet auger (also called a plumbing snake). It’s a long, flexible metal cable designed to reach deeper into the toilet trap and either break the blockage or pull it out. How to use it: Method 3: Try Hot Water and Dish Soap This works well for clogs caused by toilet paper because the soap helps it slide, and the hot water softens it. How to do it: Method 4: Use Baking Soda and Vinegar Carefully This method works by creating a gentle fizzing reaction that helps loosen minor clogs, especially those caused by toilet paper. How to do it: DIY Methods to Use With Caution These are emergency options, so you only use them if you’re stuck without proper tools. The Wire Hanger Trick This is a homemade version of a plumbing snake that only works if the clog is sitting very close to the toilet opening, almost within reach. How to do it: Please know that if you push too hard, the clog can move deeper into the S-bend. And once that happens, a hanger won’t reach it anymore, and it becomes a plumber’s job, which takes more time and higher repair costs. Wet/Dry Vacuum (Suction Method) This method is only for cases where you know for sure that something solid is stuck in the toilet, like a toy, toothbrush, or small object, and you have to take it out.  How to do it: This only works with a wet/dry vacuum. A normal household vacuum isn’t designed for water, so it can damage the motor and even create an electrical hazard. Also, the vacuum can accidentally pull in sewer gases or spray dirty water everywhere if the towel seal isn’t tight, which can spread germs and create a health risk, making the situation messier and harder for you to clean up. Avoid Harsh Chemical Cleaners Most chemical cleaners are made for sinks, where hair and grease sit closer to the surface. In a toilet, the blockage is usually further down and already sitting in water, so the chemical doesn’t always reach it properly or break it apart. These cleaners also create heat when they react inside the pipe. In older or worn plumbing, that heat can put stress on pipe joints and seals, which may lead to leaks or damage over time. If the blockage doesn’t clear, you’re left with a bowl full of strong chemical water. That becomes a problem later because anyone working on the toilet

Hot Water System

Heat Pump Hot Water Systems: The Complete Australian Guide

When you’re trying to bring down your power bills, heat pump hot water systems easily come up as one of the solutions. And rightly so – they use very little electricity and rely on heat from the surrounding air to warm your water, which works especially well in consistently warm places like Townsville. But whether they’re actually worth it depends on a few things. Performance and cost-efficiency can vary based on the type of system, how it’s installed, and how your household uses hot water. This guide breaks down how heat pump systems work, how different types compare, what they cost to run, and the key pros and cons to consider before making the switch. TL;DR What Is a Heat Pump Hot Water System? It’s an efficient water heater that extracts heat from the air around it and uses it to warm your water. A heat pump almost works like a fridge, but in reverse. Where a fridge removes heat from inside to keep things cold and releases heat into the air, a heat pump takes heat from the air outside and transfers it to the water stored in the tank. So instead of producing heat on its own like a standard electric heater, it simply moves existing heat from outside to inside the water tank, which makes it much more energy- and cost-efficient than other hot water systems.  How a Heat Pump Hot Water System Works A heat pump system works in a simple cycle that happens inside the unit in four steps. Types of Heat Pump Hot Water Systems Based on Configuration  How a system is built and arranged decides where it can be installed, how much space it takes up, and how much the installation costs. 1. Integrated Systems An integrated system is a single unit where the heat pump sits directly on top of the water tank, which is the most common setup you’ll see in Townsville.  Because it’s all in one piece, it doesn’t take up much ground space, as, instead of spreading out, it goes upwards. This makes it easier to fit into outdoor areas like side yards or small utility spaces. Installation is also quicker and cheaper because it’s more of a plug-and-play setup with fewer parts that need connecting. But since these units are quite tall, they might not fit properly if you have a low window, a low roofline, or limited vertical clearance under the eaves. Also, because the fan and motor are fixed on top of the tank, you can’t move the noisy parts away from the installation spot, so placement becomes important. 2. Split Systems A split system, as the name suggests, separates the two main parts. The water tank sits in one spot, while the heat pump unit (the noisy part with the fan and compressor) is placed somewhere else nearby, connected by pipes. This setup gives you more flexibility. If you don’t have enough height for a tall unit, or you want to keep the noise away from a bedroom, window, or outdoor sitting area, you can place the motor further away where it won’t bother you. But it costs more to set up, as installation is complex because your plumber and electrician need to connect two separate units and run extra piping between them.  Types Based on Heat Source All heat pump systems do the same basic job – they take heat and move it into your water. The only difference is where that heat comes from, the air or the ground. 1. Air-Source Heat Pumps An air-source heat pump gets heat from the air around your house. Even when the sun isn’t shining, the air holds ample thermal energy. The system pulls that air in using a fan, captures the heat inside it, and transfers that heat into your water. This is why it works so well in Townsville’s warm, tropical climate, where the air stays warm most of the year. With average temperatures around 28°C in summer and even in the coolest month of July sitting around 20°C, the system always has plenty of heat in the air to draw from, so it doesn’t have to work hard to do its job. You don’t need anything special for installation, either; just install it in a well-ventilated outdoor spot where air can freely move in and out of the unit. 2. Ground-Source (Geothermal) Heat Pumps A ground-source system gets heat from the earth underground. A few metres below the surface, the ground stays at a steady temperature all year round, no matter how hot or cold it is above. These systems use long pipes buried underground to collect that stable heat and transfer it into your water. Although these systems are efficient, they are rarely used in Australian homes because you need major digging work to install the underground pipe system, which makes installation expensive and disruptive. They are only used in large or complex builds, like commercial buildings or high-end properties with plenty of space and budget for underground piping.  Based on Heating Technology This refers to how heat is actually transferred into your water inside the tank. You can’t see it from the outside, but it plays a big role in how long the system lasts, how efficient it is, and how much maintenance it may need over time, so always ask your plumber or supplier about it before you decide on a system. 1. Wrap-Around Coils In this design, the heating coils sit outside the water tank, wrapped around it like a jacket. They don’t touch the water directly and heat it; instead, they heat the tank wall, and that heat then passes through into the water. Because the coils never touch the water, they don’t get coated with minerals found in the hard water in many parts of Australia, which forms buildup and damages components. And since the heating parts stay clean, the system runs efficiently for longer, often 15 years or more. The only disadvantage is that they can

Plumbing Inspection Townsville
Plumbing Inspection

CCTV Drain Inspections: What to Expect & When You Need One

If your sink is draining slowly, your toilet is gurgling, or you notice a strange smell coming from your yard, it’s tempting to just plunge or pour chemicals down the drain. The problem is, these are only temporary fixes, as you can’t solve the issue for good unless you know what’s really causing it, and often, the source is hidden in the pipes beneath your home. A CCTV drain inspection lets you see inside your pipes without digging up your yard, so you can understand why your drains are acting up, catch small problems before they turn into costly repairs, and make smart decisions about maintenance or repairs. In this guide, we’ll explain what a CCTV inspection is, what issues it can uncover, and why it’s worth considering, so you can protect your home and avoid unnecessary stress or expenses. TL;DR What Is a CCTV Drain Inspection? A CCTV drain inspection is a non-invasive method that uses a high-resolution, waterproof camera attached to a flexible cable to look inside the drain in real time. This gives a clear, accurate view of your pipe’s condition and helps identify specific problems like cracks, tree root intrusions, blockages, or even collapsed sections. The setup includes: Most modern systems also include a sonde, which is a small signal-emitting device attached to the camera. As the camera moves underground, the plumber uses a locator above ground to track its exact position and depth so they can pinpoint the exact spot without digging up large areas. What to Expect in a CCTV Drain Inspection Before the Inspection The plumber starts by finding the best entry point into your drain. This is usually an inspection opening, a gully, or an outdoor drain grate. You must make sure these areas are easy to access and not blocked by pots, soil, or debris. If your drain is overflowing or completely blocked with standing water, the plumber may first use a high-pressure water jetter to clear the immediate buildup and remove grease, sludge, and loose debris so the camera can actually see the pipe walls clearly. Otherwise, the footage would just show dirty water instead of the real condition of the pipe. During the Inspection After the Inspection Once the camera is removed, the plumber will go through the footage with you. They’ll show you exactly what was found, explain what it means in simple terms, and suggest the next steps, like a thorough clean or more targeted repairs. You’ll also receive a digital copy of the recording along with a report that outlines the condition of your pipes. This gives you clear evidence of your drain’s condition, which helps you plan repairs or provide proof for an insurance claim. What Problems a CCTV Drain Inspection Can Reveal A CCTV drain inspection can uncover the following issues in your pipes: Signs You May Need a CCTV Drain Inspection If you notice any of the following signs, it is a clear indicator that something is happening beneath the surface that requires a visual check. How Long a CCTV Drain Inspection Takes and What It Costs In Townsville, a residential CCTV drain inspection usually takes 30 minutes to 2 hours and costs between $250 and $550, depending on the complexity of your pipes and the inspection required.  Both the time on-site and the price can vary based on these factors: 1. Age and Condition of Pipes: Older pipes may have cracks, sagging sections, or partial blockages. Inspecting these carefully takes extra time to ensure every issue is captured, which can also slightly increase the cost. 2. Access and Layout: Inspections are quicker and cheaper when entry points, such as inspection openings, gullies, or boundary traps, are easy to reach and free of grass, debris, or soil. Buried, blocked, or hard-to-reach access points require extra preparation and setup, adding to the time and labour cost. 3. Scope of the Inspection: Checking a single blocked line is faster and more affordable than surveying your entire drainage system. After heavy rain, it’s common for plumbers to inspect both sewerage and stormwater lines, which takes longer and costs more. 4. Blockages or Debris Inside the Pipes: Thick roots, grease, silt, or other debris can slow the inspection. The plumber may need to pause and clear the line with a high-pressure jetter to allow the camera to pass, which adds both time and equipment costs. 5. Type of Inspection: A standard CCTV inspection, which focuses on finding blockages or obvious damage, usually costs around $250–$350. More advanced surveys using a pan-and-tilt camera to view all angles inside the pipe are more detailed and cost more. 6. Pipe Length: Standard fees often cover around 20–30 metres. Longer runs, such as from a distant connection to the main sewer, may incur additional charges based on distance or the extra time needed. 7. Reporting Requirements: Many plumbers include a copy of the footage and report in the standard fee, but some may charge extra for a formal report with annotated photos and a digital copy of the footage for pre-purchase checks or insurance claims.  By understanding these factors, you’ll know what to expect in both time and cost before booking a CCTV drain inspection so you can plan your day, budget accurately, and avoid unexpected delays or fees. Final Thoughts A CCTV drain inspection lets you see exactly what’s happening underground, whether it’s tree roots, sagging pipes, or build-up that’s already causing trouble or could cause problems in the future. It is also useful if you’re buying a home, checking the condition of older pipes, or need solid evidence for an insurance claim. With a clear view of your drains, you can make informed decisions and even get the compensation you’re entitled to. Once the inspection is done, your plumber can walk you through what was found and recommend the next step, whether that’s a proper clean, pipe relining, or a targeted repair, so you do not waste time or money trying temporary fixes.  If you’re in Townsville and

Water Leaks

How to Read Your Water Meter & Detect Hidden Leaks

You’ve looked at your water bill, and something doesn’t add up. You know your household isn’t using this much water, and now you’re staring at the metre wondering what it’s actually telling you. What do the numbers tell? How can you tell if there’s a leak? This guide walks you through exactly what to look for. You’ll learn how to read the key numbers, understand what they mean, and spot any unusual water use with a few simple checks. By the end, you’ll be able to check your water usage confidently, identify hidden leaks fast, and take control of your bills.  TL;DR Where to Find Your Water Meter In Townsville homes, the metre is installed out the front of the property, typically positioned along either the left or right boundary line. If you live in a unit or townhouse, the setup depends on the building. If there’s only one main metre, you can’t use it to track just your own water use or confirm a leak specific to your unit. It only shows the total water going into the whole building. In that case, leak checks need to be handled at a building level, or you’ll need help from the body corporate (the management group responsible for shared parts of the building) or a plumber who can isolate your unit’s supply. Once you are in the metre area, now look for the metre itself: in most houses, it’s installed in the ground inside a small rectangular box. In units or townhouses, it may be: If it’s in the ground, check for a covered box called a metre pit. The lid is usually labelled “Water Metre” or “TCC” (Townsville City Council), confirming you’ve found the correct metre. How to Read Your Water Meter Step by Step  Step 1: Open the Metre Box and Access The Display Once you have found the metre box, lift its concrete or plastic lid. If it feels stuck because of dirt or sand, use a flat-head screwdriver or a similar tool to gently pry it open.  Once opened, you will see the water metre assembly, which consists of three main parts: Once you can clearly see the metre face, you’re ready to move on to actually reading the numbers. Step 2: Read the Kilolitres (kL) Mechanical metre                                          Digital metre The first set of numbers shows how many kilolitres (kL) of water have passed through your metre since it was installed. One kilolitre equals 1,000 litres. This is the only figure Townsville City Council uses for your quarterly water billing because it represents the total water consumption in large, standard units, making billing easy. Step 3: Record the Litres The second set of numbers tracks individual litres. These move much faster than the kilolitre digits and are useful for spotting small leaks or tracking short-term use like a single shower or load of washing. Step 4: Calculate Your Usage To find out how much water you’ve used over a specific period, like a day, week, or month, you need two readings. For example, if your reading was 342 kL last week and 350 kL today, you’ve used 8 kilolitres, which equals 8,000 litres in seven days. Once you’re done, place the box lid back securely. This keeps dirt and sand from covering the display and protects the metre from heat, weather, and accidental lawnmower damage.  How to Detect Hidden Leaks Using Your Meter Hidden leaks can run for weeks or months without being obvious, which increases your water bill and damages your home. Your water metre gives you a quick way to confirm if there’s a leak before you bring in a plumber.  Here are two simple ways to detect leaks: 1. The 15-Minute Visual Test (For Active Leaks) This test is for leaks that are happening constantly, like a running toilet, a split pipe, or a fitting that hasn’t sealed properly. Turn off all taps, stop any appliances like washing machines or dishwashers, and let everyone in the house know not to use water for the next 10–15 minutes. Now go to your metre and look at the display. If the metre shows no movement, it means there’s no active leak. 2. The Overnight Consumption Test (For Slow or Hard-to-Notice Leaks) Some leaks are too small to notice straight away, or they don’t run constantly, as a pipe joint might only leak under pressure. So, you need to perform an overnight test to find such leaks. Before you go to bed, take a full reading from your metre. Write down all the numbers, both kilolitres and litres. Then turn off all taps and appliances and make sure no water is used overnight. In the morning, check the metre again before anyone uses water. Now compare the two readings. If the numbers are the same, there’s likely no leak. If they’ve increased, even slightly, something is letting water through. Narrow it Down: Inside or Outside If you found a leak, the next step is figuring out where it’s coming from.  Find the main valve that controls water for the inside of your home; it’s usually near your front garden tap or where the pipe enters the house. Turn this handle clockwise until it stops. This cuts off the water to your indoor taps, toilets, and appliances, but keeps the water moving in the underground pipe between the street metre and your house.  Now go back to your metre and check it again. Knowing whether the leak is inside or outside helps you explain the problem clearly when you call a plumber, which can reduce time spent diagnosing the issue. It also matters for responsibility. How to Use Your Meter to Check if Your Bill Is Right If from the above tests, your metre showed movement when no water is being used in your home and your latest bill is higher than usual without any obvious reason (like filling a pool or hosting guests), you have a confirmed leak. (We will explain later what

Our Plumbing Contractors Are Committed to You
Plumbing

How Much Does a Plumber Cost in Townsville? 2026 Price Guide

Plumbing bills can catch you off guard when the final total ends up much higher than the hourly rate you were quoted. That’s because the hourly rate is only part of the story. The type of job, how easy it is to access the pipes, the materials involved, and the urgency of the issue all play a role in the final cost. This guide helps you understand what a realistic plumbing bill looks like in Townsville, so you can predict costs more accurately, avoid nasty surprises, and know exactly what to look for when reviewing a quote. TL;DR Average Plumber Hourly Rate in Townsville In 2026, most plumbers in Townsville charge $90 to $160 per hour for standard plumbing work. This generally covers common tasks like fixing leaks, replacing taps, clearing minor blockages, or installing fixtures that don’t require specialised equipment or extensive demolition. Where your job falls within that range depends on the complexity. A simple, quick repair might be closer to $90 per hour, while standard tasks that are a bit trickier, like replacing a tap tucked behind cabinetry, can push the rate towards $160, since accessing and completing the work takes extra time, skill, and care. Please note that not every plumbing job in Townsville is charged hourly. The pricing method depends on how predictable the job is. Hourly rates are used when the time needed is unclear. For example, if a plumber has to locate a hidden leak behind a wall, it’s hard to predict how long the job will take. Charging by the hour is practical in these situations because you pay only for the actual time the plumber spends finding and fixing the issue. Fixed (or flat-rate) pricing is used when the job is straightforward and predictable. For example, installing a new toilet, replacing a basin, or swapping out a hot water system are tasks plumbers encounter regularly. They know exactly what needs to be done and how long it will take, so they can give you a total price upfront. This protects you from paying extra if the work takes a little longer than expected and makes budgeting simple. What’s Included in an Hourly Rate (And What Usually Isn’t) Your final plumbing bill is often higher than the hourly rate alone, because that rate only covers the plumber’s main labour. Extras like materials, specialised equipment, etc., come on top. Let’s have a closer look at what actually drives your total. What Your Hourly Rate Covers What Is Usually Billed Separately Other than these additional charges, remember that most Townsville plumbers charge a minimum of 1 hour. For even a small job like replacing a tap washer, which might take 20 to 30 minutes, you will still be billed for a full hour. This is because the plumber sets aside that time just for your job, turning down other work to fit you in, so the visit needs to be worthwhile. Emergency and After-Hours Plumber Costs in Townsville Plumbers charge more for work outside normal business hours, which include evenings, weekends, public holidays, or urgent situations where immediate action is needed. In Townsville, an emergency call-out fee ranges from $150 to $350. This higher fee covers the cost of having a fully equipped, licensed plumber ready to travel quickly at a moment’s notice.  Once the plumber starts work, the hourly labour rate typically rises to $180–$300 per hour. This higher rate, called an emergency loading, compensates the plumber for working outside the standard 7:00 AM to 4:00 PM window. It can feel like a lot, but that’s the cost of getting help right away, no matter the time. And more often than not, it actually saves you money. A small pipe burst can quickly turn into flooding, water damage, or even mould issues down the line if you wait until regular hours, all of which are far more expensive to deal with later. At 1touch Plumbing we offer fast, reliable emergency plumbing services in Townsville at transparent, upfront pricing. Our licensed team is ready to respond quickly, fix urgent issues safely, and give you peace of mind in a stressful situation.  Typical Plumbing Costs in Townsville Plumbing costs vary depending on the type and complexity of the job. Below, we’ve listed the usual costs for common plumbing jobs in Townsville, giving you a clear idea of what to expect. Blocked Drains and Toilets If your sink or toilet is blocked, clearing it costs between $150 and $500. Small clogs that can be cleared with a plunger or a manual drain snake are at the lower end of the range. More serious blockages, like those deep in your main sewer line, often require a high-pressure hydro-jetter, which pushes the cost closer to $500 or more. Sometimes, a drain that is slow, smells bad, or gurgles repeatedly indicates a bigger problem, such as tree roots in the pipes or a collapsed sewer line. In these cases, a plumber may use a CCTV drain camera to inspect the inside of the pipe. This diagnostic service adds $250–$350 but ensures the real problem is identified and repaired.  Leaking Taps, Toilets, and Cisterns Fixing a dripping tap or a running toilet costs between $120 and $350, depending on what part needs replacing.  Hot Water System Repairs and Replacements If your hot water isn’t working properly, repairing a faulty component, like a heating element or thermostat, costs between $200 and $500, covering both the part and the labour to install it. Townsville’s water is high in minerals, which can cause scales to build up inside your tank and wear down key parts. One of these is the sacrificial anode (a metal rod inside the tank that attracts and absorbs minerals to protect the tank from corrosion). Replacing this anode every few years for around $250 can double the life of your water heater, saving you significant money in the long run. However, if your system is over 10–12 years old or shows signs of rust, leaks, or corrosion, a full replacement

Hot Water System

Gas Hot Water vs Electric: Which is Best for Townsville Homes in 2026?

Gas and electric hot water systems differ in how they heat water, how much they cost to run, how quickly they recover, and what space and maintenance they require.  Understanding these differences helps you make the right choice. Because the system you choose directly affects your energy bills, whether you have uninterrupted hot water during peak times, and how well your setup holds up during Townsville’s storms and power outages. In this guide, we’ll break down how each system works and compare them across upfront and running costs, and long-term use, so you can see clearly which option fits your household without second-guessing your decision. TL;DR Gas vs. Electric Hot Water Systems: Quick Overview Before we dive in, a quick note on what we’re comparing here. While both gas and electric systems come in different types, gas systems are typically installed as instantaneous (continuous flow) units, while electric systems are more commonly used as storage tanks. That’s why this guide focuses on comparing gas continuous flow systems with electric storage systems, because this reflects the most common real-world choice for Townsville homeowners. Gas Hot Water System at a Glance A gas hot water system uses a burner powered by natural gas or LPG to heat water.  In a continuous flow gas system, since there is no storage tank, when you turn on a hot tap, a flow sensor detects the moving water and activates the burner. The water passes through a heat exchanger (a series of copper coils) positioned above the flame. The heat is transferred directly to the water as it flows through, so it is heated within seconds before reaching the tap.  These systems use electronic controls to adjust the flame based on demand. If you turn on a second tap, the control panel increases the gas flow to keep the temperature steady. Many units are factory-set to the safe temperature of 50°C, often removing the need for an external tempering valve to mix in cold water. Once the tap is turned off, the sensor detects the flow stop and shuts down the burner immediately, so energy is used only when hot water is actually needed. Electric Hot Water System at a Glance An electric hot water system heats water using immersed heating elements inside a storage tank.  Cold water enters the tank through a dip tube and settles at the bottom, where a heating element is placed. When the thermostat detects that the temperature has dropped below 60°C, which is the minimum storage temperature required under Queensland regulations to prevent bacterial growth, it switches the heating element on to heat the water. The heated water rises to the top of the tank and is drawn out when you open a tap, while fresh cold water flows in, and the cycle continues. Because water is stored at high temperatures, a tempering valve is installed to mix in cold water before it reaches your taps, delivering water at a safe temperature of 50°C to prevent burns. Upfront Investment: What You’ll Pay to Buy and Install Gas Continuous-Flow System Typical installed cost: $1,800 – $3,500 Gas systems are slightly more expensive upfront because they require specialist installation to manage high-intensity burners and exhaust. Costs include: Electric Storage System Typical installed cost: $1,500 – $3,000 Electric systems are cheaper upfront because most Townsville homes already have the wiring and space for a tank. Costs typically include: When Switching Fuel Types Gets Expensive You can see that gas and electric systems both fall into almost the same cost bracket, with a difference of only a few hundred dollars, but this is for a like-for-like replacement. If you change systems and fuel types, the total cost can rise quickly. Running Costs: What You Pay Over Time In Townsville, running costs vary between the two systems depending on your energy rate and daily hot water usage. You can expect to pay:  Gas Continuous-Flow System Annual running cost: $400 – $1,000 Gas costs vary depending on how the gas is supplied. For homes connected to natural gas, you pay a daily supply charge of about $0.80–$1.10. This is a fixed cost just for being connected, which adds $300–$400 per year, even if you use very little gas. On top of that, you also pay for the gas you actually use.  For homes using 45 kg LPG cylinders, a four-person family typically uses 3-5 cylinders annually. Each refill and delivery costs between $120 and $170 per cylinder, and you also pay cylinder rental of about $45–$55 per bottle annually. Altogether, this brings total yearly costs to around $800–$1,000. This makes gas a premium choice for many Townsville households. Electric Storage System Annual running cost: $600 – $900 This estimate covers a typical four-person household using a 250–315 L tank, which uses around 3,300 kWh per year. If your home has solar panels, costs can drop even further. By using a timer or solar diverter, you can heat water during the middle of the day when your system is generating excess power and store it for later use. So, there is no need to purchase electricity from the government grid.  So, gas systems are only cheaper when electric systems use the standard tariff 11. However, when you move to Tariff 33 or use solar, electric storage becomes the more economical choice.  Hot Water Performance & Recovery: How Fast You Can Get Water Performance refers to how quickly a system can deliver hot water and how long that supply lasts during peak use. The recovery rate is how fast the system can heat water again after it has been used. Gas Continuous-Flow System Gas systems are the higher-performance option because a gas burner produces a strong, concentrated flame that transfers heat directly through a heat exchanger, which lets the system heat water very quickly and deliver it within 10 to 15 seconds of turning on the tap. For continuous-flow units, the recovery rate is not really a limitation. Water is heated as it passes through the unit,

Hot Water System

Hot Water System Leaking: Causes, What to Do & When to Replace

Whether you can repair your hot water system’s leak or not comes down to what’s actually causing it. Some issues, like loose pipe connections or a worn valve, are quick and affordable to fix. Others, like a corroded or cracked tank, mean the system itself is failing and needs replacing. In this guide, we’ll walk you through what to do as soon as you notice a leak, how to figure out what’s causing it, and how to decide whether a repair will do the job or if it’s time for a new system. TL;DR What to Do Immediately When You Notice a Leak How Leak Location Helps You Diagnose the Problem Once things are under control, you can take a closer look at where the water is actually coming from. This is important because the location of the leak tells you two key things:  Here’s what each location tells you: Water Pooling at the Top If water is pooling around the top of the tank, it mostly comes from the pipes and fittings attached to the tank’s top. These connections handle the flow of hot and cold water in and out of the unit, and if they become loose or the seals wear out, water can escape. Because these components are external and easy to access, leaks here are generally minor and fixable.  Water Running Down the Side When water runs down the side of the tank, it usually comes from safety valves attached to the side. These valves are designed to release water if the pressure or temperature gets too high.   If the valve starts opening more often or keeps dripping, it can mean the valve is worn out, or the system is under constant stress, like high incoming water pressure or overheating. The plumber will check what’s causing the valve to open and fix it accordingly.  Water Seeping from the Bottom When water pools at the base of the tank, it means the leak is coming from inside the tank itself. Most tanks have a drain point near the bottom, and if water is only leaking from this tap, it’s a replaceable part.  But if water is seeping from behind the metal casing or through the insulation at the bottom, the inner cylinder has likely corroded or cracked, which is not something you can patch up, and the tank itself has failed and needs replacing. Common Causes of a Hot Water System Leaking Now that the leak’s location has given you a clue, it’s time to figure out what’s actually causing it and how to check for sure.  Loose Inlet or Outlet Pipe Connections The pipes going in and out of your tank are one of the most common places for leaks to start. These joints are sealed with threaded fittings and small rubber washers that keep the connection watertight. Over time, the metal fittings made of copper or brass expand and contract as the water heats up and cools down. This repeated movement slowly loosens the connections. The flow of water also causes small vibrations, which weaken the joint even more. On top of that, in North Queensland, constant heat and humidity can dry out and harden the rubber washers, so they don’t seal properly anymore. Once that seal weakens or the fitting loosens, water starts to escape. How to Confirm: Wipe the tank and pipe connections dry with a cloth. Wait 10–15 minutes, then check for fresh droplets at the joint. If the water appears at the pipe but the tank surface stays dry, the leak is likely from the connection. Faulty Temperature and Pressure Relief (TPR) Valve The TPR valve is a safety device located on the side of the tank near the top. Its job is to release a small amount of water if the pressure or temperature inside the tank exceeds the safety limits of around 500 kPa or 99°C, as set by Australian standards. A few drips during the heating cycle are normal. That’s because when water heats up, it expands, which slightly increases pressure inside the tank. The valve releases a bit of water to relieve that extra pressure and keep the system safe. But if you notice a steady drip or a constant stream, something isn’t right. This can happen when: How to Confirm: Take a look at the tundish, the small drain pipe running down from the valve. If water is flowing steadily, gently lift the small lever on the valve for a few seconds to flush out any dirt or mineral bits. Then let the lever close. To check your water pressure, you can attach a simple pressure gauge to an outdoor tap or the cold-water inlet of the tank. Most homes should be around 400–500 kPa.  Leaking Drain Valve The drain valve is the small tap at the bottom of your tank, mainly used for maintenance and flushing. Over time, especially in older tanks, it can start to leak because the valve’s components – plastic or brass – wear out, or sediment and mineral buildup from the local water get stuck inside, stopping them from sealing properly, which eventually causes leaks.  How to Confirm: Take a look at the base of the drain tap. If you see a steady drip or a small puddle or notice white, chalky limescale around the opening, the valve isn’t sealing anymore.  Sediment Buildup and Internal Wear Inside your hot water tank, there’s a sacrificial anode, which is a metal rod that absorbs minerals from local water and slowly corrodes to protect the tank. But if this rod is worn out, minerals in your water (like sand, calcium, and grit) sink to the bottom.  Over time, they form a layer of sediment. The heating element sits just above or embedded in this layer, so the heat it produces doesn’t transfer efficiently into the water. That means the metal directly under the element (the tank base) takes the brunt of the heat because the sediment doesn’t conduct the heat well. Over months and

Hot Water System

Instantaneous Hot Water Systems: How They Work, Costs & Pros/Cons

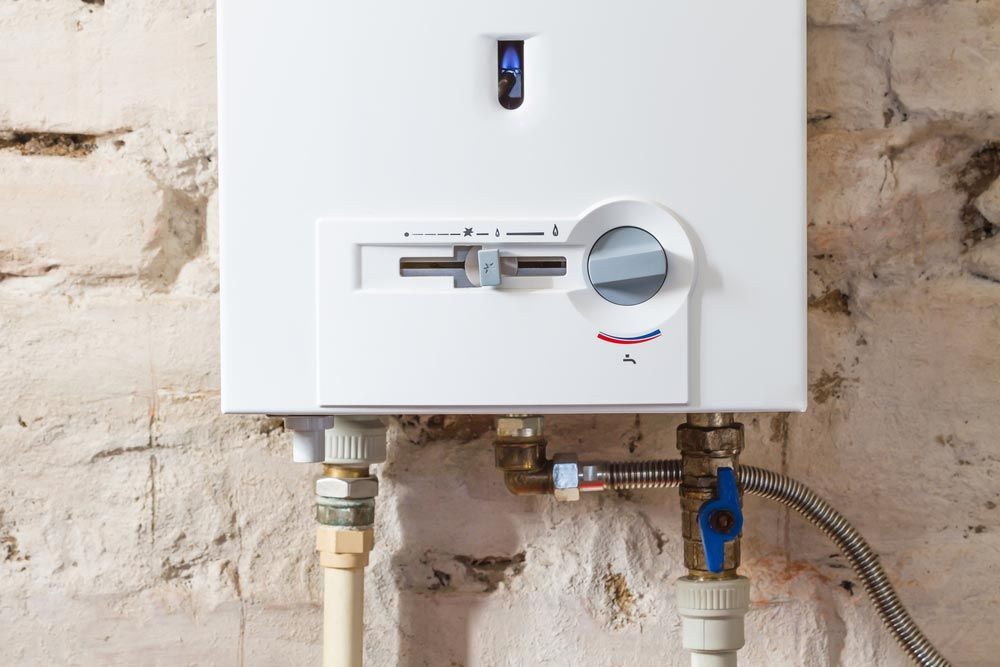
An instantaneous hot water system, also called a tankless or continuous flow system, heats water on demand instead of storing it in a big tank. That means you don’t have to wait for a big 300-litre tank to refill and reheat; just turn on the tap, and the system starts heating water right away. It’s a space- and energy-saver, and can even save you a bit on your bills. But ‘instant’ can be a little misleading. How fast the hot water actually reaches your tap and whether this type of system is right for your home depends on your house layout, how much water you use, and your plumbing setup. In this guide, we’ll break down how these systems work, how much they cost, their pros and cons, and when they make sense for your home, so you can make an informed decision.  TL;DR How Instantaneous Hot Water Systems Work When you turn on a hot tap, water starts moving through the pipe and into the hot water system. A flow sensor inside the unit detects this movement immediately and sends a signal to the electronic control unit (ECU), which acts as the system’s controller.  The ECU starts the heating process: At the same time, cold water flows into a copper pipe inside the heat exchanger. The burner or elements heat the exchanger, and that heat transfers through the copper pipe into the moving water. Because the water is constantly flowing, it heats up in seconds and continues heating as long as the tap stays on. Before the water leaves the unit, a thermistor (temperature sensor) measures the water temperature as it reaches the outlet of the unit. The system is mostly set to heat water to around 60°C in Queensland homes to prevent bacterial growth and meets Australian safety standards. If the water isn’t at that set temperature, the electronic control unit (ECU) adjusts the heat instantly by:  Once the water reaches that set temperature, it leaves the unit and travels through your pipes. Before it reaches bathroom taps, it passes through a tempering valve, which mixes in cold water to bring it down to a safer 50° to prevent burns.  Finally, when you turn the tap off, the water flow stops. The flow sensor detects this, and the ECU shuts down the burner or heating elements, and the system goes back to standby mode.  Types of Instantaneous Hot Water Systems Based on Energy Source 1. Natural Gas Systems A natural gas instantaneous system is a tankless unit connected directly to your home’s mains gas supply.  These systems can deliver high flow rates because gas burners can produce a large amount of heat very quickly. This high heat output allows the system to heat more water at once, which is why they’re commonly used in family homes with higher hot water demand. In Townsville, homes that already have a gas connection often go with this option because it provides strong, consistent hot water and is typically cheaper to run than electricity. 2. LPG (Liquid Petroleum Gas) Systems An LPG instantaneous system works the same way as a natural gas unit, but instead of being connected to a gas line, it uses gas cylinders stored outside the home. These systems are more expensive to run than natural gas because you not only pay for the gas but also for delivery, bottle refills, and rental of the cylinders. As for performance, there’s no real difference. LPG units still use a gas burner, so they can produce high heat quickly and handle high demand without a noticeable drop in temperature. This makes LPG a practical option for homes that don’t have access to mains gas, which is common in rural or outer parts of North Queensland. 3. Electric Instantaneous Systems Electric instantaneous systems use high-powered heating elements instead of a gas burner to heat water on demand. They’re smaller and more compact because they don’t need parts like a burner, flue, or ventilation, so you can easily have them installed inside cupboards, under sinks, or in tight spaces. But heating water instantly with electricity takes a large amount of energy in a very short time. A standard single-phase power supply can only deliver a limited amount of electricity at once, which is not enough to heat large volumes of water for your entire house while multiple taps are running. To handle higher demand, electric systems require three-phase power. But, most homes don’t have this by default, as single-phase is the standard for residential properties. And if you want to upgrade to three-phase, it often involves changes to the switchboard and supply connection, which is quite expensive. Because of these limits, electric instantaneous systems in Townsville are only used in lower-demand setups, like a single bathroom or a granny flat, where only a small amount of water needs to be heated at a time. Based on Heating Technology 1. Standard (Non-Condensing) Systems A standard instantaneous system is the basic gas model that heats water with a gas burner, and the hot gases created during combustion are vented straight out through a flue. Some of the heat produced in the burner escapes with those exhaust gases, which means not all the energy from the gas goes into heating your water. Because of this, these units are less energy-efficient than newer designs. These systems are popular in many older homes in Australia because they are simple and cheaper to buy upfront. 2. Condensing Systems A condensing instantaneous system is a high-efficiency version of a gas unit. It works like a standard system but with one key improvement: it reuses heat from the exhaust gases. The hot gases from the burner normally leave through the flue. In a condensing system, these gases pass through a second heat exchanger, which transfers much of that leftover heat into the incoming cold water. This means more of the gas energy actually heats your water instead of being wasted. However, these systems cost more upfront, but in Townsville homes

Scroll to Top