Why Does My Roof Leak in Heavy Rain? Common Causes, What to Do, and How to Prevent It
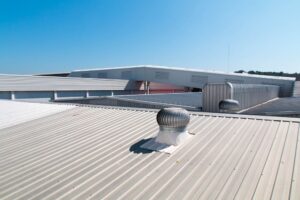
A roof can look fine and still leak the moment heavy rain hits. That’s simply because light rain doesn’t carry enough pressure to push through a small gap or crack, but heavy rain does. And once water gets past the roofing sheets, it moves into your insulation, timber, and ceilings before you ever see it. Below, we break down the most common causes, which leaks you can safely fix yourself and how, which ones need a licensed professional, and the signs that mean your roof needs replacing instead of another repair. TL;DR What Are the Most Common Causes of Roof Leaks in Heavy Rain? Heavy rain can put extra pressure on your roof and expose problems that stay hidden in lighter rain. Below are the 11 most common causes of roof leaks and how to spot them. 1. Blocked Gutters and Downpipes Townsville homes receive an average of 312.4 mm of rainfall in February alone, so your gutters and downpipes need to move a lot of water away from your roof in a short time. During the dry season, leaves, twigs, and other debris can build up in the gutters. When the first big wet-season storm hits, all that debris can compact into a blockage and slow the flow of water. Once your gutters and downpipes can’t drain the water quickly enough, it starts backing up inside the gutter. The rising water can then: 2. Worn or Failed Flashing Flashing is the thin material used around roof joints, edges, and penetrations to stop rainwater from getting into your roof structure. You’ll find it around chimneys, walls, vent pipes, skylights, roof intersections and valleys, where different roof surfaces meet, and water can find its way through. In Townsville, flashing has to withstand intense UV radiation, salt-laden air, heavy rainfall, and constant thermal movement as your roof heats up and cools down. Over time, these conditions can cause the flashing or its sealants to crack, shrink, lose flexibility, or pull away from the surrounding roofing materials. Once a gap develops, heavy rain can get underneath the flashing and into the roof structure, leading to water damage inside your home. 3. Corroded Screws and Washers on Metal Roofs The screws holding your metal roof panels have a washer beneath their heads that presses against the metal panel to create a watertight seal. The local tropical climate, humidity, and strong UV exposure can cause the screws to corrode and the washers to harden, shrink, or crack over time. Once the washer loses its seal, water can seep around the screw during heavy rain and enter the roof cavity. You may eventually notice water stains on the ceiling, damp insulation, or other signs of a roof leak inside your home. 4. Damaged or Deteriorated Roof Tiles and Sheeting Cracked roof tiles and lifted metal sheeting can give rainwater a direct path into your roof. During heavy rain, water can flow through cracks in roof tiles and collect beneath the roofing material. When the roof underlay becomes saturated from prolonged or heavy rainfall, excess water can reach the roof structure and ceiling space, causing leaks inside your home. Metal roofing can develop a similar problem when the edges of the sheeting lift. Strong winds can get underneath the raised edge and push against the sheet, weakening the seal between sheets or around the roof screws. Once that seal is broken, heavy rain can flow underneath the sheeting and into your roof. 5. Blocked Roof Valleys Roof valleys are the low points where two roof slopes meet, so they carry a concentrated flow of rainwater towards the drainage system. Leaves, twigs, and other debris can build up in these channels and restrict the flow of water. During heavy rain, a blocked valley can cause water to pool and back up beneath the surrounding roof tiles or metal sheeting. Once water gets underneath the roofing material, it can reach the roof underlay and roof structure, causing leaks in your ceiling space. 6. Poor Roof Drainage Design or Insufficient Capacity Some roofs struggle during heavy rain because the gutters and downpipes simply can’t move water away quickly enough. For example, a gutter designed to handle 100 mm of rain per hour cannot handle 200 mm per hour, even when it is clean and well maintained. The excess water can overflow towards the roof edge, fascia, and eaves, where it can get into the roof structure. This is a common problem in some older Townsville homes. The gutters and downpipes may have met the requirements when the home was built but have less capacity to cope with today’s more intense rainfall events. Incorrect gutter fall can make things worse. Your gutters need a slight slope towards the downpipe so water can drain properly. When a gutter is level or slopes away from the downpipe, water can sit along the gutter instead of flowing towards the outlet. During heavy rain, the extra water increases the risk of overflow and can enter through the fascia, eaves, or roof cavity. 7. Water Ponding on Flat or Low-Pitch Roofs Flat and low-pitch roofs need a slight, continuous slope to direct rainwater towards the drainage outlets. When the roof has insufficient fall or low spots in the surface, water can collect instead of draining away. Once water starts ponding, it can sit on the roofing membrane for a long time. And then, constant exposure to standing water, combined with intense UV rays and repeated heating and cooling, can speed up membrane deterioration. Over time, the membrane can crack or delaminate, particularly around the edges of ponded areas, allowing water to get into the roof and cause leaks. 8. Deteriorated or Failed Roof Underlayment (Sarking) Your roof’s underlayment, often called sarking, acts as a secondary water barrier beneath roof tiles or metal sheeting. It catches and redirects water that gets past the outer roofing layer, helping keep it away from the roof structure. Over time, age, heat, and moisture can cause sarking to become brittle, […]
7 Signs Your Hot Water System Needs Replacing
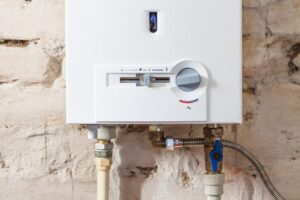
A hot water system doesn’t usually stop working out of nowhere. It gives off clear signs first, and knowing what to look for means you’re not stuck with a cold shower and no warning. If you notice most of these signs happening together, that’s usually your cue it’s time for a replacement. And if it’s only a couple, you can probably still save it with a service or a faulty component replaced. In this guide we’ll walk you through both: the signs your system’s reached the end of its life, and the ones telling you it can still be saved. TL:DR: 1. Unusual noises like rumbling, popping, or banging A hot water system running normally is usually quiet. Any rumbling, popping, or banging from a storage tank means sediment has built up at the bottom and is disturbed when the system heats up. If the noise is recent and the system is otherwise working normally, a professional flush can often clear the sediment and resolve it. If the noise has been building for a while, especially on a system that’s older (8-10 years) or has had sediment issues before, the buildup may already have affected the tank’s internal condition, and replacement will be necessary. 2. Leaks or pooling water around the unit Water collecting around the base of the system is one of the clearer signs something’s wrong, but where it’s coming from changes what it means. 3. Rusty, discoloured, or smelly hot water If water from your hot tap comes out brown, reddish, or muddy while your cold tap runs clear, the problem is inside the hot water system, not your water supply or general plumbing. This usually traces back to the sacrificial anode. The anode’s job is to corrode in place of the tank, protecting the tank walls. But once it wears out, the tank itself starts corroding instead, and that’s what shows up as rusty water, a metallic smell or taste, or a recurring rotten-egg odour. If the anode is caught before the tank itself has corroded, replacing it alone is usually enough since it stops the corrosion, and the system keeps running normally. If the corrosion has already reached the tank, whether because the anode wasn’t replaced in time or the tank is 8-10 years old, an anode swap won’t undo that damage. This is when replacement becomes the more reliable option. 4. You’re getting less hot water than usual If your hot water used to comfortably get you through your routine and now runs out earlier, the cause is usually one of two things: a component wearing out, or your household outgrowing the system. If your tank is around 8-10 years old and the system has already had a heating element or thermostat repaired before and is still falling short, that strongly points toward replacement. Because at this point, it must have sediment build-up too, which also reduces the system’s water heating capacity significantly. If the tank age was around 4-5 years old, it’d most likely been a single failing component (heating element or thermostat), which is easily repairable/replaceable. And for any sediment build-up it might have, thorough servicing will get it going for another 4-5 years, with regular maintenance. Or, sizing may be the real issue, not age at all. Your household may have grown since the system was installed. Or, if you recently moved into the property, the system may have been sized for the previous household’s usage, and was never actually right for how you use hot water, regardless of its age or condition. Either way, the fix is upgrading to a system sized for your actual demand. 5. Your energy bills are suddenly increasing A hot water system can become less efficient over time without stopping altogether, and your energy bill will give you a warning about that. Sediment buildup is the usual cause in older systems. It settles at the bottom of the tank and insulates the heating element from the water, so the system has to run longer to reach the same temperature it used to hit much faster. A faulty thermostat causes the same kind of waste. If it doesn’t switch off once the water’s hot enough, the system keeps drawing power for heat you don’t need Similarly, a faulty thermostat that won’t switch off even when the water’s heated enough will keep drawing power for heat you don’t need, hence more $$$ on the bill. That said, a higher bill alone doesn’t mean you need a new hot water system; plenty of things can push it up that have nothing to do with your hot water system. But if it’s climbing alongside anything else on this list – noise, less hot water, a system pushing 10 years old – then it’s worth connecting back to your hot water system specifically. 6. Hot Water flow has dropped noticeably A faulty valve or sediment-clogged pipework can restrict your hot water flow, and a valve issue often causes lukewarm water alongside the weak flow, which is a useful way to tell the two apart. Most flow restrictions are repairable, and a plumber can clear or replace the affected valve or pipework. So in this case you don’t need a replacement unless the sign is showing up alongside rust or persistent leaks. 7. Your hot water system is more than 10 years old The age of a system is not automatically a reason for replacement, but it changes how every sign above should be read. For example, a noise, a leak, or reduced hot water on a 3-year-old system is very likely a single fixable component. But the same sign on a system past the 10-year mark is more likely a sign the system as a whole is reaching the end of its service life, and repairing one part often just means the next part fails soon after. At this age, you need to weigh whether a repair is really solving the problem or just delaying the same conversation. Repair […]
Solar Hot Water vs Heat Pump: Which Is Best For Your Home?
Hot water can account for 15% – 30% of your electricity bill, so the system you choose will have a big impact on your household’s annual energy costs. And you’re right to consider Solar and Heat Pump hot water systems – they’re standout options for cutting that cost. Both draw on natural energy instead of pure grid power to heat your water, but one will suit your home a lot better than the other. Let’s discuss how each system works, what setup and space they need, and what they cost upfront and to run long-term, so you can see which one makes the most sense for your home. TL;DR The quick verdict: What you need to know: What Is a Solar (Thermal) Hot Water System? A solar thermal hot water system uses direct energy from the sun to heat the water your household uses every day. Sunlight hits the roof-mounted solar collectors, usually flat-plate or evacuated tube collectors. Copper pipes inside the collectors absorb heat from the sun and transfer it to the water flowing through them. The heated water then moves into the storage tank, ready for use. During cloudy weather or the wet season, solar heating drops because there is less sunlight, so an electric booster automatically switches on to heat the water to 60°C, as required by Queensland law, to prevent bacterial growth and keep your hot water supply reliable. What Is a Heat Pump? A heat pump hot water system is a refrigerator in reverse. It extracts heat from the air, transfers it into your water, and releases cool air into the environment. A fan draws in warm air and passes it over an evaporator coil containing refrigerant. The refrigerant absorbs heat from the air and changes from a liquid into a low-pressure gas. The gas then passes through a rotary compressor, which increases its pressure and temperature. The hot, high-pressure refrigerant moves through a heat exchanger, where it transfers its heat to the water inside the storage tank. Once the refrigerant releases its heat, it cools and condenses back into a liquid. It then passes through an expansion valve, which lowers its pressure and prepares it to absorb heat from the air again. Solar vs Heat Pump Hot Water Systems: What’s Best for You in Townsville? The right choice between solar and heat pump for your home depends on a few different factors, as we have discussed below: Upfront Costs: What You’ll Pay to Install Solar Hot Water System Typical Installed Cost (Before Rebates): $5,000–$10,000+ A solar thermal hot water system costs more upfront because you install a complete roof heating system that includes: Heat Pump Hot Water System Typical Installed Cost (Before Rebates): $4,500–$7,500+ A heat pump system costs less upfront than solar thermal because the heat pump unit sits at ground level, which keeps installation simpler. You pay for: Operating Cost: What You’ll Pay to Run It Solar Hot Water System Typical Running Cost: $100–$300 per year Solar hot water systems have very low running costs in Townsville and can cover up to 90% of your hot water needs with little reliance on grid electricity. The small running cost comes from: You can reduce running costs further by connecting your electric booster to the Ergon Energy Tariff 33 that provides cheaper electricity for 16 hours a day. Heat Pump Hot Water System Typical Running Cost: $150–$400 per year A heat pump costs a little more to run than solar thermal, but it still uses 60% to 75% less electricity than a standard electric storage system. This makes it a little less cost-efficient than a solar thermal system but still much more than a traditional electric system. The running cost comes from: You can lower your heat pump’s running costs by: Performance & Reliability: How It Handles Townsville Conditions Solar Hot Water Systems With 300+ sunny days a year and an average of 8.5 hours of sunshine a day, there’s enough sunlight to heat your water for most of the year. So safe to say it’s a great match for most Townsville homes. During winter and the wet season, solar output drops, so the electric booster turns on to bring the water up to the required temperature. However, Townsville’s coastal salt spray and strong UV exposure can wear down solar outdoor components over time. Choose a Grade 316 stainless steel storage tank and corrosion-resistant collector materials to protect your solar system and keep it reliable for longer. Heat Pump Hot Water Systems Heat pumps are also well suited to Townsville, as the daytime temperatures exceed 30°C in summer and stay around 24–27°C in winter, so the system has plenty of warm air to draw heat from year-round. And unlike solar, a hot water heat pump doesn’t need direct sunlight, so it can heat the water at night and on rainy or cloudy days. The only concern is (same as it is for solar thermal) Townsville’s salty coastal air and high humidity. Salt and moisture can corrode the outdoor evaporator coil over time, so choose a quality heat pump with an anti-corrosion coil coating to maintain efficient heat transfer. Maintenance & Lifespan: What to Expect Over the Years Solar Hot Water System Expected Lifespan: 15–20+ years A solar hot water system is high maintenance because its collectors and other outdoor components are exposed to Townsville’s weather, which can cause them to degrade faster. The maintenance includes: Heat Pump Hot Water System Expected Lifespan: 10–15 years A heat pump has more moving parts than a solar system, but servicing is simpler because the entire unit sits at ground level and technicians can access it easily. The maintenance includes: Space & Roof Suitability: Will It Fit Your Home? Solar Hot Water System With solar thermal, your roof matters the most because the system needs enough sunny, usable space for the collectors. You must consider: Heat Pump Hot Water System A heat pump is easier to fit in most Townsville homes, especially those with limited or unsuitable […]
Hot Water System Maintenance Guide for Townsville Homes: 9 Tips to Extend Its Life
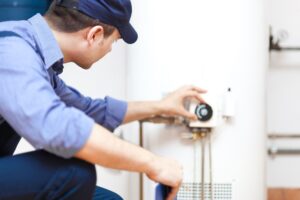
Your hot water system is one of the hardest-working appliances in your home, and one of the easiest to forget about, until you turn on the tap and get a cold shower instead of a hot one. Or the water runs rusty. Or there’s a puddle at the base of the tank you can’t explain. The good news is that most of this is preventable. A handful of simple checks done regularly can catch these problems while they’re still small, long before they turn into a cold shower or a call-out repair. In this guide, we’ll explain how to maintain electric, solar, heat pump, and continuous-flow hot water systems, and when to book professional servicing. TL;DR Know Your System Before You Start Before carrying out any maintenance, identify the type of system installed in your home. Most Townsville homes have one of the following hot water systems: Once you’ve identified your hot water system, you can carry out the appropriate maintenance checks. 9 Essential Hot Water System Maintenance Tips 1. Check the Anode Rod Townsville’s water contains minerals that can gradually corrode the inside of storage hot water systems. To help prevent this, these systems use a sacrificial anode rod, which attracts corrosive minerals before they can damage the steel tank. As the anode rod performs its function, it gradually wears down and becomes less effective. If it isn’t replaced when needed, the storage tank becomes more vulnerable to corrosion, which can shorten the system’s lifespan. What to do: 2. Ease the Temperature Pressure Relief (TPR) Valve Storage hot water systems use a Temperature Pressure Relief (TPR) valve near the top of the tank to release excess pressure as water heats and expands. Over time, minerals can build up inside the valve, causing it to stick or fail to seal properly. What to do: 3. Flush Sediment from Storage Tanks Storage systems gradually collect sediment at the bottom of the tank. As the sediment layer thickens, the system has to work harder to heat the water, reducing efficiency and increasing wear on the heating element and the tank. What to do: 4. Clean Solar Collector Panels Solar collector panels rely on direct sunlight to heat the water in your storage tank. Dust, bird droppings, coastal salt, leaves, and other debris can gradually build up on the glass, reducing the amount of sunlight the panels absorb. As a result, the system becomes less efficient and relies more on the electric or gas booster to heat the water. What to do: 5. Clean Heat Pump Air Filters and Keep the Unit Clear Heat pump hot water systems draw heat from the surrounding air to warm the water in the storage tank. Grass clippings, leaves, and fast-growing vegetation can quickly block the air intake or restrict airflow around the unit. Reduced airflow forces the heat pump to work harder, lowering efficiency and increasing energy use. What to do: 6. Inspect Pipe Insulation and Pipework Hot water travels through insulated pipes from the storage tank to your taps. Over time, intense sun can cause pipe insulation to crack or deteriorate, while weather, moisture, and normal wear can affect exposed pipework, valves, and fittings. Damaged insulation allows heat to escape, while leaks and corrosion can reduce efficiency and lead to more costly repairs if left unchecked. What to do: 7. Flush the System After Long Periods of Low Use When a hot water system sits unused for weeks, water can remain in the tank and pipework for an extended period. Stagnant water can develop unpleasant odours, and minerals and sediment can settle in the system, affecting water quality and system performance. What to do: 8. Check for Rust, Corrosion, and Pest Activity Townsville’s humid climate and coastal air can accelerate corrosion on exposed metal components. Outdoor hot water systems may also attract insects, spiders, geckos, and other pests that can interfere with electrical components or gas burners. What to do 9. Check the Thermostat Setting The thermostat controls the temperature of the water stored in your hot water system. Under Queensland law, storage systems should maintain a temperature of at least 60°C to help prevent the growth of harmful bacteria. A faulty thermostat can cause water to become too hot, not hot enough, or heat inconsistently, affecting both safety and efficiency. What to do: Seasonal Maintenance for Townsville Homeowners In addition to the tips above, Townsville’s tropical climate brings a few season-specific things worth watching for. Here’s what to check depending on the time of year: Season What to Watch For Recommended Check Dry Season (May–October) Dust, coastal salt, and prolonged sun exposure can affect solar panels, pipe insulation, and outdoor units. Clean solar panels, inspect pipe insulation, and remove debris from around outdoor units. Wet Season (November–April) Heavy rain, humidity, and storms can increase the risk of corrosion, water pooling, and reduced solar performance. Check drainage, inspect for leaks or rust, and ensure the solar booster is working properly. Final Thoughts The tips in this guide will help you stay on top of your system’s condition, catching the obvious stuff before it turns into a bigger problem. But there are parts of the system you can’t safely access yourself, and that’s what a licensed plumber is for. We recommend scheduling an annual service so someone can take a proper look at the parts you’re not equipped to check, and catch anything that needs repairing or replacing before it turns into a system failure at the worst possible time. Our plumbers at 1Touch Plumbing are QBCC licensed and ready to help, whether your system’s due for a service, needs a repair, or just isn’t performing like it used to. Contact us today to keep your hot water system performing at its best. FAQs How much does hot water system servicing cost in Townsville? A routine hot water system service in Townsville costs between $250 and $400, depending on the type of system and the work involved. If worn components need replacing, repairs range from […]