
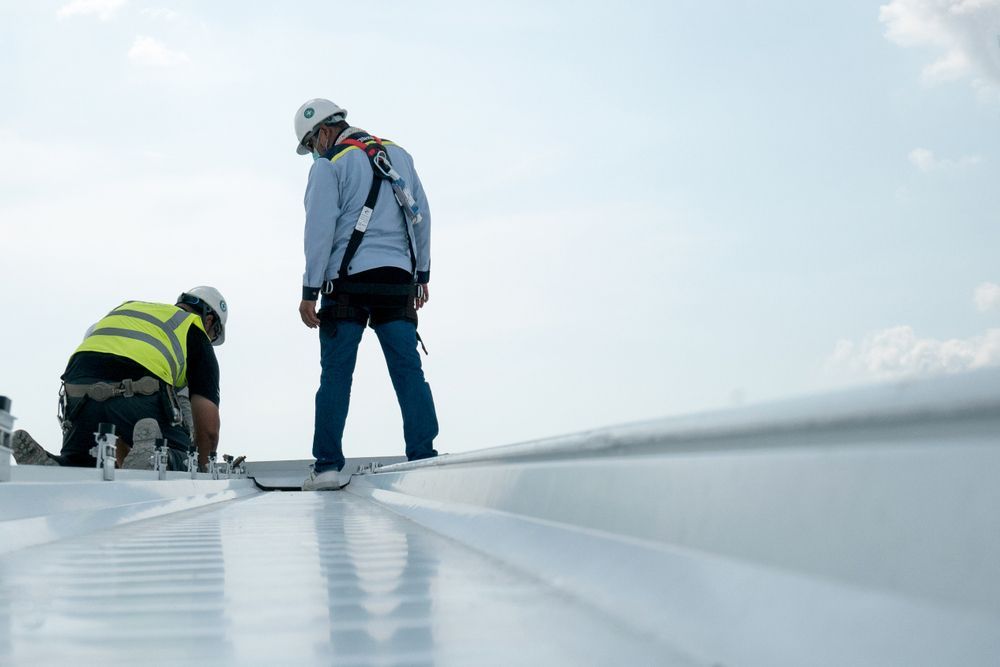
Roof Repair

Roof Inspection Townsville
Roof Repair

How to Stop a Roof Leak Fast: Temporary Fixes, Real Repairs, and What Not to Do

Even a small roof leak can quickly soak insulation, damage ceilings and timber framing, create electrical hazards, and lead to mould if water keeps coming in. This guide shows you how to find where a leak is actually coming from, stop it safely with a temporary fix suited to your roof, and avoid the mistakes that turn a small leak into a bigger one. TL;DR What to Do First to Stop a Roof Leak How to Stop a Roof Leak Temporarily Once you’ve taken the necessary safety precautions, follow these step-by-step instructions to temporarily stop water from entering your home. Step 1: Make Sure It’s Safe to Inspect or Repair the Roof  Before planning any temporary repair, consider the weather and the condition of your roof. Do not climb onto the roof if: Onceit is safe to go on the roof, then move to the next step.  Step 2: Gather the Right Tools and Materials Before accessing your roof, gather the right equipment to make the repair safer, quicker, and more effective.  Here is what you need:  Avoid using household products such as silicone, duct tape, expanding foam, or general-purpose construction adhesives. They’re not designed to withstand Australia’s harsh weather conditions and can fail in the sun, heavy rain, or as the roof expands and contracts.  Step 3: Find the Exact Source of the Roof Leak Rainwater travels along roof battens, rafters, sarking, insulation, or roof sheeting before entering the ceiling and dripping, so you must know exactly where the water is getting in to repair it. Start by identifying where the leak is visible inside your home. Watch out for water stains on the ceiling or walls, bubbling paint, damp plasterboard, mould growth or active drips during rainfall. This narrows your search to one section of the roof rather than the entire roof. Next, if it’s safe and you can access the roof cavity, inspect it using a torch. Check the area above the ceiling damage for wet insulation, damp roof framing, water stains on timber, active drips, or daylight coming through the roof. Water often leaves visible trails as it runs along rafters or battens, so follow these trails uphill, as they can lead you closer to where the leak is entering the roof.  From there, follow the moisture trail to nearby roof features such as the ridge cap, roof valley, skylight, roof vent, chimney, or solar panels. Noting these landmarks will help you find the same area when you look at the roof from outside. Step 4: Inspect the Roof to Identify What’s Causing the Leak You now know the likely location of the leak, so inspect the roof from outside. Grab a ladder and climb up onto the roof – start at the highest point above the suspected leak and work your way down, checking each roof component for damage that would allow water in. Check the following areas: Step 5: Choose the Right Temporary Repair Method Once you’ve identified the cause of the leak, choose one of the temporary repair methods below that matches the type and extent of the damage.  Replace a Leaking Roofing Screw Roofing screws are fitted with neoprene washers that create a watertight seal. Over time, these washers can harden, crack, or compress, allowing water to seep around the screw. If only one or two screws are leaking: Seal Small Gaps Around Flashing Using Roofing-Grade Sealant If the flashing is securely fixed but water is entering through small gaps or deteriorated sealant, a roofing-grade sealant can provide a temporary waterproof seal. Clean and dry the surface and then apply the sealant. Run a continuous bead along the gap to ensure it completely seals the opening without leaving any gaps. This method is suitable for minor gaps around skylights, roof vents, chimneys, and other roof penetrations. It won’t solve leaks caused by loose, rusted, or damaged flashing, which requires replacement. Patch Small Holes or Splits in a Metal Roof Using Self-Adhesive Tape Small punctures, rust pinholes, or minor splits in metal roof sheeting can be covered with self-adhesive roof repair tape or a roof patch. To apply it: Temporarily Cover a Cracked Roof Tile Cover cracked tile with heavy-duty waterproof plastic that extends beyond the damaged area. Tuck the edges of the plastic under the surrounding tiles to keep it in place and direct rainwater over the affected tile instead of through it. Install a Temporary Roof Tarp for Larger Leaks or Storm Damage If your roof has missing roofing sheets, broken roof tiles or large openings from a storm, a waterproof tarp can keep rain out until permanent repairs are done. To apply it:  Clear Minor Blockages If your inspection found leaves or debris blocking the gutters or roof valleys, carefully remove them by hand or with a scoop to restore water flow. Then check that water drains freely into the downpipes. If water still isn’t draining properly, the blockage may be inside the downpipe and require further clearing or professional assistance.  Step 6: Check That the Temporary Repair Is Working When you finish the temporary repair, be sure the repair material is secured, the tarp is in place, or the replacement screw is sealed securely. Look for any gaps, loose edges or areas where water could still get in. Then inspect the affected room for: Remember that ceilings, insulation, and timber continue releasing trapped moisture for hours or days after the leak stops. A few residual drips don’t necessarily mean the repair failed, but if you notice new water entering your home or the affected area continues to spread, you should call a licensed roofer right away. Step 7: Arrange a Permanent Roof Repair Delaying permanent repairs can turn a minor leak into a more costly problem. Ongoing water intrusion can damage insulation, ceiling linings, timber framing, and internal finishes, while increasing the risk of mould, timber rot, and corrosion. Book a professional roof inspection as soon as possible to assess the full extent of the damage and repair

Roof Inspection Townsville
Roof Repair

Roof Waterproofing Services: What’s Included and What to Expect

Roof waterproofing protects your home by creating a sealed protective layer across your roof that stops rainwater from penetrating inside. Without it, water slowly works its way through cracks and worn spots, and by the time you notice, the damage is already done. The signs it’s needed are usually very telling – a musty smell that won’t go away, mould showing up in the attic or on nearby walls, water stains on your ceiling, and shingles that are curling or cracking.  Now, cost-wise, you’re typically looking at somewhere between $1,000 and $10,000, but it depends on the size of your roof, its current condition, and what materials the job calls for. It’s not a small spend, but a proper waterproofing job can last up to 25 years, so you’re really paying once to protect your home for decades. In this guide, we’ll walk you through what actually happens during a waterproofing job, the materials your contractor will likely bring up, and the questions worth asking before you hire anyone. TL;DR What’s Typically Included in a Roof-Waterproofing Service? In Townsville, roof waterproofing can only be done by licensed roof plumbers or waterproofing contractors if the work is worth more than $3300, which involves the following:  1. Roof Inspection First, a technician comes to your place, climbs up on the roof, and takes a good look around. They check for: They try to figure out where water is coming in from. Once they find the problem spots, they snap some photos and explain to you what’s going on, so you can see the issue clearly before any work starts. 2. Roof Cleaning Next, they give the roof a thorough cleaning; this is called ‘surface preparation’. They use high-pressure water to wash off dirt, moss, mould, bird droppings, and anything loose that stops the coating from sticking properly. This step is very important because waterproof coatings only bond well to a clean surface. If there’s dust or moisture left behind, the coating won’t stick properly and could peel off later. 3. Small Repairs Before applying any waterproofing, the expert checks for visible damage so the new layer can stick evenly to the surface. This includes: These repairs are necessary because if you just cover up damaged areas with waterproofing, the uneven, broken surface underneath can keep shifting, cracking, or getting worse over time. That can loosen or split your waterproof layer above it, letting water seep back in through the same weak spot. 4. Sealing the Weak Points Now the plumber focuses on the spots where roof leaks happen most often. This includes pipe openings, skylights (glass windows on roofs that let in natural light), and roof edges. These areas fail more because they have joints, gaps, and openings through which water can easily slip.   They seal these areas using waterproof sealants and strengthening materials that block water from getting underneath the roof surface. 5. Applying the Waterproof Layer This is the main part of the service. The expert spreads a liquid waterproof coating across the whole roof using rollers or spray tools. Once it dries, it turns into a flexible protective layer, like a rubber skin over the roof. This blocks rainwater and also protects the roof underneath from the sun, moisture, and weather damage. The coating is applied in multiple layers. After the first coat dries fully, they add the next one on top. This creates a smooth, thicker, more durable waterproof barrier that’s less likely to crack or wear out. 6. Checking Drainage After coating, the plumber checks the roof drainage system to make sure water can flow off the roof properly. If water stays sitting in one place for too long (ponding), it can slowly weaken even a new waterproof layer. To prevent this, the professional examines the gutters, drains, downpipes, and the roof’s slope. If they find any problem, they may recommend clearing blockages, adjusting the roof slope, or improving drainage points so water can drain away properly instead of collecting on the roof. 7. Final Inspection and Clean-Up Finally, the plumber inspects the roof one more time to make sure everything is sealed properly and evenly coated. They also clean up the site and remove any leftover dirt or material.  After that, you get a warranty that if the waterproofing fails or starts leaking within a certain time because of poor workmanship or material failure, the team will come back and repair it at zero cost.  Types of Roof Waterproofing Solutions You May Be Offered The right solution depends on your roof material, slope, drainage, sun exposure, and how much movement or foot traffic the surface gets. Most Common Types of Roof Waterproofing Solutions – At a Glance Roof Type Best Waterproofing Solution Average Lifespan Metal Roofs (Colorbond, steel) Liquid-applied membranes, Acrylic coatings, PU coatings 10–15 years (liquid), 5–10 years (acrylic), 10–15 years (PU) Flat Concrete Roofs Torch-on bitumen membranes, Silicone coatings, Cementitious coatings, PU coatings 15–25 years (bitumen), 15–20 years (silicone), 8–12 years (cement), 10–15 years (PU) Tiled Roofs Liquid-applied membranes, Acrylic coatings 10–15 years (liquid), 5–10 years (acrylic) Roofs with Drainage Problems Silicone coatings, PU coatings, EPDM membranes 15–20 years (silicone), 10–15 years (PU), 25-30+ years (EPDM) Large Flat Roofs PVC or TPO sheet membranes, EPDM membranes 20–30 years (PVC/TPO), 25-30+ years (EPDM) 1. Membranes A membrane is a thick, continuous, waterproof layer that covers the roof like a shield. It is stronger and lasts longer than coatings.  Liquid-Applied Membranes These are liquid waterproofing materials rolled or sprayed over the roof, where they dry into a seamless rubber-like layer.  They are commonly used on metal and tiled roofs and complex roof shapes because the liquid spreads into cracks, joints, screw holes, and uneven areas to fully seal the surface. Most systems last around 10–15 years.  Torch-On Bitumen Membranes This membrane uses thick rolls of bitumen (a sticky, tar-like, waterproof material) heated with a gas torch, so they melt, fuse, and stick to the roof to create a thick, waterproof sheet. They are mainly used

Roof Repair

DIY Roof Leak Repair: What You Can Fix Yourself vs. When to Call a Pro

Some roof leaks you can fix yourself in an afternoon. Others will cost you far more if you try. The tricky part is knowing which is which, because DIY-ing the wrong one doesn’t just leave the problem unsolved, it can mean structural damage, a bigger repair bill, or a nasty fall from an unstable roof. In this guide, we’ll show you exactly what’s safe to tackle yourself, what isn’t, and how to do the DIY repairs properly when you do take them on. TL;DR First Steps When You Notice a Roof Leak Roof Leak Repairs You Can Do Yourself Now that you’ve found the source of the leak, you can fix it yourself if it’s caused by one of the common minor issues below.  1. Replacing Worn Roof Screws on Metal Roofs On metal roofs, one of the most common leak points is the roof screws. Each screw has a rubber washer underneath it that creates a waterproof seal. Over time, the rubber dries out, cracks, or flattens, allowing water to seep through the screw hole. How to replace a leaking roof screw 2. Replacing a Cracked Roof Tile If you have a tiled roof, even one cracked tile can let rain slip underneath and reach your ceiling.  How to replace a broken roof tile 3. Resealing Around Roof Pipes and Plumbing Vents Most roofs have pipes for plumbing or ventilation. Around these pipes is a rubber seal called a dektite or pipe boot that prevents water from entering. Over time, these rubber seals can crack, dry out, or pull away from the roof, allowing water in. How to reseal a leaking pipe boot Never use bathroom or cheap all-purpose silicone, as it breaks down quickly in the sun and rain. 4. Patching Small Holes in a Metal Roof Small rust holes in metal roofing can be temporarily patched instead of replacing the whole sheet.  How to patch a small hole 5. Fixing Leaky Flashing and Roof Valleys Some of the most common roof leaks happen where different parts of the roof join. Two common trouble spots are: These areas carry large amounts of rainwater. If debris builds up or the metal lifts slightly, water can get underneath and enter the roof. How to repair minor flashing or valley leaks 6. Cleaning and Re-Sealing a Whirlybird A whirlybird is a round, spinning roof vent that removes hot air from the roof space and improves ventilation. They sit near the top of the roof and spin when the wind passes through them. Over time, wind, storms, and heat can loosen the base or damage the seal around it, allowing rainwater to enter. How to fix a leaking whirlybird If the whirlybird is dented, rusted, or not spinning, replacement is the better option. 7. Clearing Blocked Gutters Before They Cause Leaks If you’ve confirmed the roof is fine and the problem was just blocked gutters causing water to overflow back into the house, then you have to clean them.  How to clear blocked gutters properly Roof Leak Repairs That Usually Need a Professional Roofer If you notice any of the following problems, it’s best to call a licensed roofer instead of trying to fix it yourself. These types of roof problems need proper inspection, specialised equipment, and repairs that meet local safety and building standards.  Our team at 1touch Plumbing can identify the exact cause of the leak and carry out safe, long-lasting repairs suited to Townsville conditions.  How to Decide: DIY Fix or Call a Pro? We’ve created this quick checklist to help you decide whether a DIY repair is enough or if you need to call a professional roofer.  The “Go Ahead and DIY” Checklist If you can tick all of these boxes, you can likely handle the repair yourself: The “Call a Pro” Checklist If even one of these points is true, you need to hire a professional: Final Rule of Thumb: When in doubt, stay on the ground. A professional roof plumber has the insurance and safety equipment to handle the risks that you, as a homeowner, shouldn’t take. The cost of a pro is far cheaper than the cost of an accident or a ruined roof. When a Roof Leak Repair May Not Be Enough Sometimes a simple roof repair isn’t enough because the damage is widespread or the roof has reached the end of its life. In these cases, repairs are only temporary, and the problem will keep returning. A full roof replacement is needed if any of the following apply: Final Thoughts When roof leaks happen, act quickly to contain the damage and prevent it from becoming a much bigger and more expensive problem. Attempt DIY repair only if it’s a small, clearly visible issue that is safe to handle and you are confident that you know how to solve it.  If you have any doubt about the source of the leak, the extent of the damage, or your ability to fix it properly, it is always better to call a professional. A wrong repair can easily make the problem worse or hide more serious damage that continues to spread inside your roof. For reliable help in Townsville, reach out to our team at 1touch Plumbing. Our licensed professionals will inspect your roof, identify the leak source, and carry out safe, long-lasting repairs or recommend replacement if needed.

Scroll to Top