Author name: admin

Pipe Inspections

What Is Pipe Relining? Process, Costs & When You Need It

Pipe relining has become a popular solution for homeowners dealing with recurring drain and sewer pipe problems, and for good reason. Instead of digging up your yard, driveway, or floors to replace damaged pipes, plumbers can repair them from the inside using a trenchless method that is faster, less disruptive, and often more cost-effective. But while pipe relining offers clear advantages, it’s not always the right fix for every pipe problem. Factors like the pipe’s condition, alignment, and overall structure can sometimes disqualify you for relining, and in those cases, complete replacement is often a better option. This guide explains everything you need to know about pipe relining, including how the process works, when it’s suitable, what it typically costs, and when a full pipe replacement may make more sense. TL;DR What Is Pipe Relining?  Pipe relining is a trenchless, non-invasive method to fix damaged sewer and drain pipes. Instead of tearing up your yard, driveway, or floors, plumbers insert a resin-coated liner into the existing pipe. Once it hardens, it forms a strong, seamless pipe within a pipe that can last 40–60 years. It’s commonly used to stop leaks, block tree roots, and improve slow drains without the mess and cost of traditional excavation. In Townsville, this method is especially useful because many older homes have earthenware or early PVC pipes joined in sections. During the wet season, soil shifts and tree roots can push into these joints, causing cracks, leaks, and blockages. Relining solves this by creating a continuous, joint-free inner pipe, so roots can’t get in, and your plumbing flows smoothly. How Pipe Relining Works: What Happens Step by Step 1. CCTV Inspection and Damage Assessment The first step is to inspect the inside of the pipe using a specialised drain camera to see exactly what’s wrong and confirm whether relining will work. Here’s what the technician does during the inspection: In these cases, excavation and pipe replacement may be required. 2. High-Pressure Cleaning and Pipe Preparation Once the CCTV inspection confirms the pipe is suitable for relining, the next step is to thoroughly clean and prepare it.  Any grease, roots, or mineral buildup left inside can stop the resin from bonding properly, so the pipe must be cleared before the liner goes in. Here’s how plumbers get it ready: 3. Measuring the Pipe and Preparing the Liner Once the pipe is clean and ready, the plumber prepares the liner, which is the material that will become the new pipe inside the old one.  Here’s what happens: 4. Installing the Liner Inside the Pipe Now it is time to insert the resin-soaked liner into the existing pipe. Plumbers typically use one of two methods, depending on the pipe layout and access points. 1. Inversion method (turned inside out into the pipe) In this method, the liner is placed into a pressurised container called an inversion drum. Compressed air or water pushes the liner into the pipe while turning it inside out as it moves forward. Inside out means the resin-coated side of the liner, which will form the new pipe wall, ends up pressed against the inside of the old pipe, while the plain side faces the centre.  This method is especially useful for pipes with bends, because the pressure helps the liner bend and follow the curves without wrinkling or folding. 2. Pull-in-place method For straight pipes or small repairs, a cable or winch line is first fed through the pipe. The prepared liner is attached to this cable and pulled into the exact position where the damage is located.  Once the liner is in place, the plumber uses the CCTV camera to confirm the liner is positioned correctly and fully covering the damaged section before the curing process begins. 5. Inflating the Liner to Shape the New Pipe Once the resin-soaked liner is in place, it needs to be pressed firmly against the inside of the old pipe so it forms a strong new pipe wall. Plumbers do this by inserting a long inflatable tube, called a calibration tube or bladder, inside the liner. Compressed air or water is pumped into the tube using specialised equipment on the truck at the work site. As the bladder inflates, it pushes the liner tightly against the pipe walls, ensuring the resin spreads evenly and seals all cracks and damaged joints. 6. Curing the Resin With the liner held tightly in place, now it is time to turn the liquid resin inside the liner into a strong, solid pipe lining. In warm climates like Townsville, the resin can sometimes cure naturally over a few hours because higher temperatures speed up the hardening process. However, to complete the job faster and more reliably, plumbers often circulate hot water or steam through the inflated bladder. The added heat helps the resin cure evenly along the entire length of the liner. Once curing is complete, the liner hardens into a rigid, seamless pipe inside the old one. The original pipe becomes a protective shell, while the newly cured lining carries the wastewater flow. 7. Reopening Branch Connections After the new liner is in place, it covers the points where smaller pipes – from toilets, showers, or sinks – connect to the main sewer line. These connections need to be reopened so water can flow from every fixture. Plumbers do this using a small, remote-controlled cutting tool with a camera. The technician navigates the tool to each connection using the CCTV footage and locations from the initial inspection. The cutting head then precisely opens a hole in the liner that matches the size of the branch pipe. This restores the connection while keeping the inside of the pipe smooth and even, so wastewater flows freely without getting caught on rough edges. 8. Final CCTV Inspection and Verification After the new liner is cured, plumbers perform a final CCTV inspection to make sure the repair is done correctly. A camera is sent through the full length of the pipe to check that

Plumbing

What to Do When a Pipe Bursts: Emergency Step-by-Step Guide

A burst pipe can turn your day upside down in minutes. Water can damage floors, walls, ceilings, and furniture – and if it isn’t dealt with promptly, trapped moisture can lead to mould within 24-48 hours, which can cause serious health issues in the long run and further damage to your home.  This guide shows you step by step what to do during and after a burst pipe, so you can limit damage, cut down on repair costs, and feel confident handling one of the most stressful household emergencies. TL: DR First 5 Minutes: Safety and Rapid Triage When a pipe bursts, your first instinct might be to stop the water immediately to prevent it from ruining floors, walls, and furniture. But your priority should be safety because electricity running through wet areas and ceilings weakened by water is more dangerous. Electrocution or a collapsing ceiling can cause serious injury in seconds, while water damage, though costly, can be fixed later. Here is what you should do in the first 5 minutes: Before You Step In – Check for Electrical Danger In Australian homes, power circuits run at 230–240 volts, which is enough to cause serious injury or even be fatal if electricity passes through water you are standing in. Simply touching or stepping into electrified water can give you a severe shock. Before you do anything, take a careful look around and watch for these warning signs: If any of these are present, don’t step into the water. Instead, step outside and call a qualified electrician or your local emergency services.  Look Up – Ceilings Collapse Faster Than You Think If a burst pipe is in your ceiling or roof cavity, water quickly soaks into the plasterboard. Dry plasterboard is strong, but once it becomes saturated, it softens and can no longer support its own weight. As water accumulates, the ceiling starts to sag and may collapse. The more water it holds, the faster and more likely it is to fall. Here are some warning signs you shouldn’t ignore: If you notice any of these:  Work Out What Kind of Water You’re Dealing With The cleanup, health risks, and even what you can safely touch all depend on whether it’s clean water from a supply pipe or contaminated water like sewage or stormwater.  Clean Water (Category 1) Category 1 water is clean, treated drinking water that comes directly from your supply lines. It’s obviously safe to touch. Most bursts that produce clean water come from: Once you’ve confirmed the water is clean, you can manage it with the steps we will discuss later.  Contaminated Water (Category 2–3) Categories 2 and 3 water is dirty or contaminated and can carry bacteria, viruses, or harmful chemicals. Most contaminated water comes from: Once you know the water is contaminated, don’t step in it with bare hands or feet; wear gloves and boots at a minimum. Keep people and pets out of the area and stop the water from spreading to other rooms by closing doors or laying towels at doorways. Decide – Stay and Manage, Or Step Back and Call You can stay and manage if: Step outside and call for help if: If you decide to stay, you need to follow the following process to stop the water, protect your home, and prevent further damage. Step 1: Shut Off the Water (This Is Where the Damage Stops) Check if You Can Isolate the Affected Fixture If the leak is coming from under a sink, behind a toilet, or from a washing machine hose, look directly below or behind that fixture for a small shut-off valve made from chrome or brass. Turn that valve clockwise until it stops. Once it’s closed, check the leak immediately, as the water should slow and stop within seconds. If the leak slows or stops, you’ve successfully isolated it and can keep the rest of the house’s water supply running. If it doesn’t stop – or you can’t find a valve – move straight to shutting off the main water supply. Shut Off the Main Water Supply In Townsville homes, the main water shutoff is usually located in one of these spots: Once you’ve located the main water valve, turn it off immediately. There are two common types: Older Townsville homes may have ageing valves that are stiff or stuck. If the valve won’t turn easily, please don’t force it, as this could break the pipe or valve. Instead, call an emergency plumber or contact the local water authority to shut off the supply at the street. If you live in a unit or apartment with shared plumbing, contact building management first. Turning off the wrong valve could cut water to other units or damage shared pipes. Drain the System  Even after you’ve turned off the main water supply, there’s still water left inside the pipes. That water is under pressure, so the damaged pipe can continue to leak slowly. To relieve this pressure: Once the pipes are drained, active flooding stops.  Step 2: Contain the Water and Protect Important Stuff Around the House Redirect Active Drips  If water is still dripping from a ceiling or pipe joint, position buckets underneath immediately to catch the drips.  For drips that have already run across floors or tiles, you can use towels, cloths, or plastic sheeting to create a barrier or channel that leads the water into containers instead of letting it reach carpets, cabinetry, or timber floors. Pay special attention to vulnerable areas: If the Ceiling Is Bulging A bulging or sagging ceiling is serious because plasterboard loses strength when soaked and can collapse under the weight of trapped water.  You can safely release this water only if: If you meet those conditions and feel confident: Please, when in doubt or if the ceiling is large, multiple areas are sagging, or water is dripping from several points, move everyone out and call an expert immediately. Move Priority Items First After controlling drips and protecting vulnerable areas, move

Plumbing

Pre-Purchase Plumbing Inspections in Townsville: Complete Buyer’s Guide (2026)

When you’re buying a home, it’s natural to focus on what’s right in front of you – the layout, the light, the street, and the overall feel of the place. Plumbing rarely gets the same attention during inspections, simply because most of it is hidden, and problems don’t always show up during a walkthrough. By the time leaks start staining walls or drains begin backing up, you’ve already settled, and the repairing responsibility is yours. That’s why a pre-purchase plumbing inspection is worth having. It helps uncover what you can’t see before you commit. In this guide, we’ll walk you through what’s included, why it’s important, and how to choose the right inspector for the job. What a pre-purchase plumbing inspection covers: Cost, timing & prioritising issues: Choosing the right inspector: What a Pre-Purchase Plumbing Inspection Covers A pre-purchase plumbing inspection checks all the pipes, drains, and fixtures in a property you’re thinking of buying. It shows you exactly what’s working and what’s at risk before you move in, which gives you bargaining power. Water Supply and Pipework Condition This part of the inspection focuses on how water enters and moves through the home. It assesses pipe materials, leak risks, pressure levels, and shut-off controls to determine whether the system is reliable and compliant. Identifies the Pipe Material and Its Condition One of the first things a plumber checks is the material of pipes because it indicates whether replacement should be budgeted for in the near future. Galvanised steel, often found in older Townsville homes, rusts from the inside. Water reacts with the steel, forming scale buildup along the pipe walls that narrows the pipe. Eventually, the metal becomes thin, and small leaks begin to form. By the time you see water damage, the pipe is already deteriorated. Copper does not rust like steel, but it can corrode when exposed to moisture, salt air, and minerals in the local water. In coastal areas of Townsville, salty air settles on exposed pipe joints. When that salt mixes with condensation, it creates a mild acidic reaction that slowly eats away at the copper. This can lead to slow leaks that worsen over time. Polybutylene pipes, used in many homes built during the 1980s and 1990s, degrade differently. Chemicals in treated water can make the plastic brittle. These pipes often fail suddenly at pipe fittings without warning, leading to bursts and significant water damage. Check for Active and Hidden Leaks The plumber checks whether the system is already leaking. They start with visible areas by:  If nothing obvious is visible, a pressure test may be carried out. The plumber closes all taps and isolation valves to seal the water system, then uses a calibrated pressure gauge attached to the pipework or water meter to monitor the system pressure. If the gauge shows the pressure dropping over time while no taps or appliances are running, it indicates water is escaping somewhere hidden – inside walls, under floors, or beneath the slab. Measures Water Pressure to Ensure Safe Limits The plumber measures water pressure using a gauge connected to an outdoor tap. This shows how much force the water is pushing through the pipes. Under Queensland Building and Construction Commission (QBCC) guidelines, residential water pressure must not exceed 500 kPa. If the pressure exceeds 500 kilopascals, a pressure limiting valve (PLV) must be installed to protect the plumbing system. If a PLV is already installed, the plumber checks that it is working correctly. A failed or faulty valve can allow sudden pressure spikes into the system, which defeats its purpose and leaves the plumbing unprotected. Assesses Water Flow Performance in Fixtures Pressure is how hard the water is being pushed. Flow is how much water actually comes out. You can have strong pressure but still get weak flow. For example: To check for flow, the plumber runs multiple fixtures at the same time — for example, they turn on a shower and then open a basin tap. If the water flow drops sharply when the second fixture is opened, it means the supply line cannot deliver enough volume. This can happen because: This test helps identify internal restrictions that a pressure gauge alone will not detect. Even if the pressure reading is compliant, poor flow can signal ageing pipes or hidden blockages. Tests Isolation and Shut-Off Valves The final step is checking whether the water can be shut off quickly if there is an emergency. The plumber tests: Each valve must turn easily and completely stop the water flow. If a valve is stiff, seized, or does not fully close, it is a problem because in a burst-pipe situation, every minute counts. If the main valve cannot be operated, water will continue flowing into the house until the supply is shut off at the street, and that delay can cause major water damage. Drainage and Sewer Network  Many suburbs in Townsville have reactive clay soil, which expands when wet and shrinks when dry. This constant movement puts pressure on buried sewer pipes, which can crack, separate at the joints, or sink out of alignment. Repairing these issues can be expensive, often ranging from $5,000 to $15,000, depending on the damage. A proper drainage check during a pre-purchase inspection can catch these issues early, helping you avoid costly problems after you buy the home. Tests Drainage for Proper Water Flow The plumber begins by running water through the home in a controlled way. They flush toilets and turn on showers, basins, and sinks to check for: Inspects with CCTV Drain Camera Most sewer and stormwater pipes are hidden under slabs, driveways, or gardens, so surface checks are not enough. A pre-purchase plumbing inspection often includes a CCTV camera to inspect the inside of the pipes. The plumber feeds a flexible camera into the line through an access point to check for:  Identifying these issues lets the current owner plan for repairs or replacements before they become your responsibility. Assesses for Root Intrusion  Roots naturally grow

Hot Water System

How to Choose the Right Hot Water System for Townsville’s Tropical Climate

Hot water is the second-largest energy guzzler in the average Australian home, so picking the right system is important to make sure your power bills don’t spin out of control. To help you make the right decision for yourself, we have broken the process into eight simple steps: Let’s walk you through each of these steps to ensure you select a system that’s reliable,  cost-efficient, and correctly sized to meet your family’s hot water demand. Step 1: Use Your Current System to Narrow Your Choices Looking at your existing hot water system helps you narrow down your options before you start comparing models.  First, note the type of system you’re using now, like electric, gas, solar, or heat pump: If you’re happy with its performance, a like-for-like replacement is usually the simplest choice because it works with your existing power supply and plumbing. But if running costs or efficiency have been an issue, this is your cue to consider upgrading to a different system type. Next, check the age of the unit on the manufacturer’s label: Systems nearing the end of their typical 10-year lifespan are usually better replaced than repaired. At this point, it’s better to upgrade to a more efficient option because you’re already planning a full replacement. Yes, it will cost more due to new wiring or plumbing, but it’s often worth it for long-term savings. Finally, look at the size and position of your current system: This tells you what capacity works for your household and whether a new system can fit in the same location. If your hot water demand has increased or the space is limited, this can guide you towards a larger tank, or a continuous flow system for a compact upgrade. By understanding what your current system does well, and where it falls short, you can confidently choose between a simple replacement or an upgrade that better suits your home and lifestyle. Step 2: Pick the Most Efficient Energy Source Hot water can use around 25% of household energy in Townsville, so picking an efficient energy source to heat the system is one of the simplest ways to lower your bills. Heat Pumps A heat pump is a reversed air conditioner. Instead of releasing heat like an AC unit, it pulls heat from humid, tropical air to warm your water. In Townsville, the air is always warm enough, averaging 25 to 31°C, to provide free heat even in the middle of the night. This constant warmth allows them to stay at maximum efficiency 365 days a year.  Solar PV Synergy If you have solar panels, you should be using your own energy. Instead of selling your extra solar power to Ergon Energy for a small 8.6-cent credit, you can use that energy to heat water during the day and store it for use at night. Using your solar power this way is much smarter than buying expensive electricity at 33 cents from the grid at night. Gas Systems Gas units are a great option if your home already has a natural gas connection, as these units provide endless hot water.  But if you rely on LPG cylinders for the gas supply, which are twice as expensive as piped gas, it won’t be a good option anymore. Plus, you’ll have to pay for bottle rental and delivery, which adds further to the cost. Electric Storage Electric storage is often the best choice for emergency replacements if you are on a tight budget. These units are the cheapest to install but the most expensive to run. If you choose this energy source, ask your plumber about connecting the unit to Ergon’s Tariff 33. It’s a dedicated economy circuit that supplies cheaper power for about 18 hours a day. This keeps running costs down without the higher upfront price of other systems. Step 3: Choose Between Tank and Tankless Systems In Townsville, your choice usually comes down to two options – a big storage tank or a compact on-demand system. Each has a different impact on your water pressure and your electricity bill. Storage Tank Systems A storage tank is like a giant thermos. It keeps a large volume of water hot and ready for you to use.  This is the most common choice for large families because it handles the morning rush very well. If you have two showers running at the same time while the washing machine is on, a storage tank provides the best water pressure across all your taps. Choose a tank system if you are on Ergon Energy’s economy tariffs. These tariffs offer significantly lower electricity rates. The tank heats the water during those low-cost windows and then retains it for later use.  Please note that these systems lose heat when water sits idle and use extra energy to reheat it, which raises your bills. And once the tank runs out, you’ll need to wait for it to heat up again. Continuous Flow (Tankless) Systems Continuous flow systems do not store any water. Instead, they heat the water through a small coil as soon as you turn on the tap.  In Townsville, these systems are very efficient because our “cold” water is not exactly freezing cold, so the unit doesn’t have to work as hard to heat it. The downside is they can struggle with pressure if several taps run at once – your shower might lose flow if someone starts the laundry. For smaller households, a continuous-flow system is a space-saving win that delivers endless hot water on demand and ensures you only pay to heat what you actually use. Step 4: Understand Your Household’s Hot Water Demand Getting the size right of your hot water system is super important because,  To find the ideal size, a good starting point for storage tanks is to allow for 50 litres/person/day of hot water. This covers average showers, doing the dishes, and general cleaning.  Beyond just the number of people, you need to look at how your family actually uses

Hot Water Systems Townsville
Hot Water System

Hot Water Installation Costs: Typical Price Ranges, What Impacts Your Quote, and How to Save

Replacing a hot water system in Townsville isn’t just about the unit’s price tag. Given the region’s high humidity, mineral-rich water, and the strict Queensland plumbing codes, a simple swap involves several technical and legal layers that affect your final bill. In this guide, we’ll share a transparent breakdown of 2026 installation costs, helping you choose a system that survives the North Queensland climate without overpaying for unnecessary extras. Quick 2026 Price Snapshot: What influences your final quote: How to reduce installation costs: Before you commit to a quote: Average Hot Water Installation Costs (2026 Guide) In Australia, most hot water system installations range between $1,400 and $7,500+. This cost typically includes: A simple electric storage replacement in a modern home with compliant plumbing will sit at the lower end. Systems like heat pumps or solar push costs higher because they involve more components, specialised mounting, and additional setup work. But step into Queensland, and the story changes. Prices here typically run $200–$500 higher than the national average because the state’s strict safety rules and mandatory compliance checks mean that even a simple replacement often requires adding specific equipment, such as a tampering valve, which increases the total cost.   In Townsville, the tropical climate drives prices even higher, with residents paying 10%-15% more. The heat, humidity, seasonal storms, and mineral-rich water here mean your system needs stronger, more durable components and upgrades, which justify the cost increase.    Cost Breakdown: What You’re Actually Paying For in Townsville Hot water installation costs can vary widely based on the following main factors, so you know exactly what you’re paying for. The Water Heater Unit (Equipment) The first major cost factor is the unit itself. Their prices are based on capacity, technology, and construction quality but normally range from $450 to $6,000+.  Capacity affects cost because bigger tanks need more materials to heat a larger volume of water. For example, a 400 L electric tank costs more than a 125 L tank because it has a bigger tank, thicker insulation, and a larger heating element.  With gas systems, output is measured in litres per minute (L/min), and higher flow rate units cost more because they contain larger burners and more robust heat exchangers. Construction material also affects price, especially in humid coastal regions like Townsville, where stainless steel tanks cost more than vitreous enamel tanks because they better resist corrosion from salty, moist air and hard water. Higher-efficiency models cost more upfront because they have extra internal parts. For example, condensing gas units include a secondary heat exchanger that captures heat from the exhaust and uses it to warm your water again. Warranty length also influences price. Systems with 10–12-year tank warranties are built with thicker linings or corrosion-resistant materials, which increases manufacturing costs compared to 5–7-year models. In short, if you buy a larger, tougher, and more efficient unit, it will cost you more upfront but usually save you money and headaches over the long run. Labour (Plumber and Electrician) Labour is the second major cost driver because installing a hot water system safely requires two different professionals.  In Townsville, a licensed plumber usually charges $100–$150 per hour, while a licensed electrician adds $80–$130 per hour to handle wiring and install the mandatory isolation switches. To make things easier, many local installers offer a fixed-rate labour package that covers both experts. The total labour cost increases based on time, access, and the amount of work involved. A straightforward like-for-like replacement in the same location using already installed pipes usually takes 2–4 hours, which keeps labour costs lower. Costs increase when: Moreover, in Queensland, homes built on stilts have higher labour costs because plumbers need to: On top of this, if your home has old galvanised pipes that are corroded, they often need to be replaced before the new system can be legally connected under National Construction Code (NCC) 2022 standards (Australia’s National Construction Code for plumbing and building safety). This adds both materials and labour time. Permits and Legal Compliance In Queensland, replacing a hot water system is notifiable work, which means it must be reported to the council to keep your home insurance and warranty valid. Your plumber will need to lodge a Form 4 with the Queensland Building and Construction Commission. The online registration fee is $35.67, and the offline/manual registration fee is $48.17 – it’s a small but necessary part of the job. Some extra hardware is also required by law, and it can affect your quote: Removal and Disposal You can save $85 – $250 by removing your old hot water tank yourself. Just keep in mind that a 250 – 315 L steel tank can weigh over 100 kg when full, and even drained, it’s still heavy and difficult to move. If you’re confident handling that weight safely, you can do it yourself. If not, it’s worth paying for professional removal. How much it costs depends a lot on access. If your tank sits on a concrete slab in the back yard, it’s quick and easy. But if it’s tucked in a ceiling or needs to be carried downstairs in a high-set Queenslander, labour costs go up because plumbers need extra time and safety precautions to handle the heavy lifting. Always check your quote carefully. Make sure it explicitly covers drain, haul-away, and site cleanup, as you don’t want to be left with a rusty tank or a pile of metal offcuts once the plumber has finished. Hot Water System Installation Cost by Type The type of hot water system you choose is the biggest factor in your quote. Standard tanks are the least expensive upfront, while high-efficiency options such as heat pumps or solar cost more. Let us break down the cost of each system. 1. Standard Storage Tank (Electric or Gas) Typical Installed Cost: $1,400 – $2,500 Standard tanks store a fixed amount of water and keep it ready for use all day. If your new tank is going in the same spot as the old one

Plumbing

Why Your Toilet Cistern Doesn’t Fill Up (and How to Fix It)

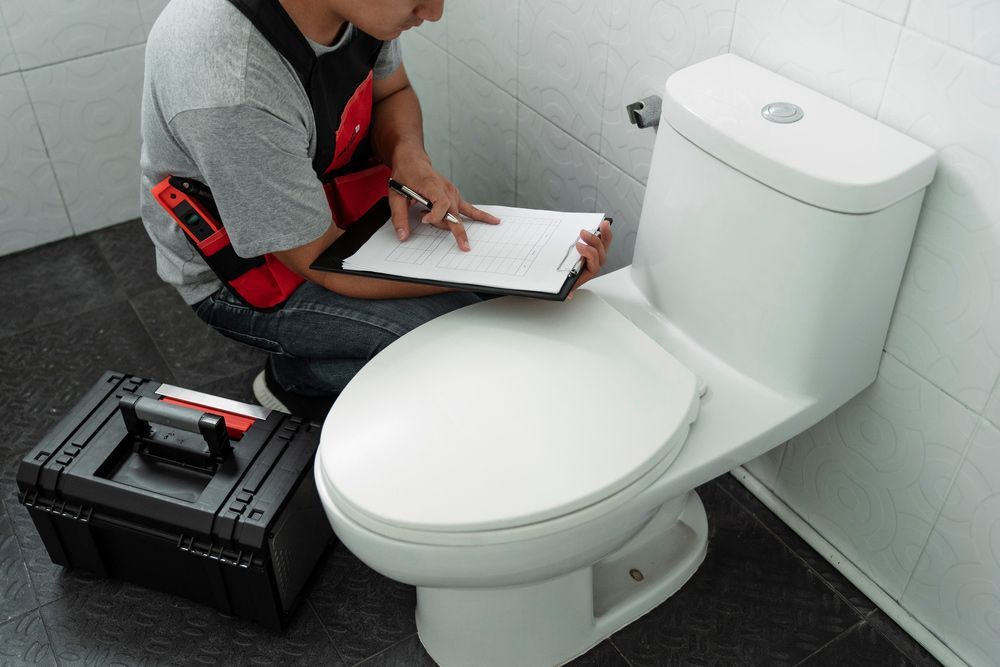
Most toilet cistern refill issues are caused by a single internal component failing to do its job, so the key to fixing this issue is finding that part. Normally, after you flush, the cistern refills when the water flows from the home’s supply line through the isolation valve beneath the toilet into the fill valve inside the cistern. As the tank fills, a float rises with the water level. Once the correct level is reached, the float signals the fill valve to shut off the supply. If any one of these parts is restricted, worn, misaligned, or partially closed, the cistern won’t refill properly. In this guide, we’ll cover how the cistern refill system works, the most common reasons it fails, and the tools and steps to get your toilet working properly again. TL;DR Check for External Causes: Is Water Reaching the Cistern? Before you lift the cistern lid, check the water supply. Often, a toilet cistern that won’t fill just isn’t getting water properly because of an external obstruction.  And usually that blockade is easy to find with a few quick steps, saves time, and avoids unnecessary fiddling with the cistern. Here’s how: Observe Water Entering the Tank Lift the cistern lid and watch the water level while the isolation valve (which controls water flow into the cistern) is fully open. This step quickly shows whether water is reaching the tank or if something is restricting it. Check the Isolation Valve Behind or beside your toilet, you’ll see a small chrome tap — that’s the isolation valve, which controls water flowing into the cistern. If it’s partially closed or blocked, the cistern can’t fill. Inspect the Supply Hose The cistern connects to your home’s cold water supply via a flexible hose made of braided stainless steel. This hose runs from the isolation valve into the tank, carrying water to refill it after each flush. Any blockage, kink, or damage in this hose can stop the cistern from filling properly. You check for the following: What to Do Next Once you’ve completed these external checks: Most Common Internal Causes (and the Fix for Each) Once you’ve ruled out supply issues, the cistern itself is the next place to look.  In Townsville, the high mineral content of the water can accelerate wear on rubber and plastic parts inside the cistern. Over time, this makes the components more prone to sticking, warping, or clogging, which can stop your toilet from refilling properly.  But the good news is that most are easy to spot and fix once you know what to look for. 1. Fill Valve Float Set Too Low Inside the cistern, the fill valve controls how water enters the tank after a flush. Attached to the valve is a float, a small buoyant sensor that rises with the water level. As the float rises, it pushes or triggers a lever inside the fill valve that tells the valve to stop letting water in. If the float is set too low, it signals the valve to shut off before the tank is actually full, leaving the cistern underfilled. This often happens after a recent move or a new toilet installation, when even a small bump can knock the float slightly out of position.  Also, over time, mineral deposits from Townsville’s hard water can build up around the float, restricting its movement. When the float can’t rise freely with the water level, it may signal the fill valve to shut off too early. This leaves the tank underfilled, resulting in weak or incomplete flushes. To check for this problem, open the cistern lid and gently lift the float. If water starts flowing as soon as you move it, the float is set too low, which means the system itself is working – it just isn’t getting the correct signal. How to fix it:  2. Debris or Mineral Scale Blocking the Fill Valve Even if your water supply is fine, the fill valve inside the cistern can get clogged by minerals in the local water, as fine sediment can slowly accumulate on the small rubber diaphragm, restricting water from entering the tank. You will notice this when the rest of the house may have normal water pressure, but the cistern either stays empty or fills very slowly. A silent tank – no trickling or hissing of water – can also indicate an internal blockage. To check for this issue:  How to fix it: Quick tip: Even after you clean the valve, mineral buildup will slowly return. It’s worth taking a few minutes every year to pop the lid off and give the fill valve a quick clean. That small bit of maintenance can save you from dealing with a slow-filling cistern later on.  3. Flapper or Flush Valve Leak At the bottom of the cistern is the flapper, a round rubber seal that sits over the flush valve opening. When you flush, the flapper lifts, allowing water to rush into the bowl. As the water level inside the cistern drops, the flapper falls back into place and seals the opening again. Once sealed, the fill valve refills the tank with fresh water. Over time, minerals accumulate on the flapper and the flush valve seat and create small gaps or rough patches that prevent the flapper from sealing properly. This allows water to leak continuously into the bowl, preventing the cistern from filling fully.  The small chain connecting the flush handle to the flapper also plays a role — if it’s too tight, it can pull the flapper slightly open even when you’re not flushing, allowing water to trickle continuously. You can spot this issue easily:   How to fix it: 4. Refill Tube Misalignment or Overflow Issues Inside the cistern, there’s a small, flexible hose called the refill tube that directs a small amount of water into the overflow pipe – the vertical pipe in the cistern that prevents water from spilling out if the tank overfills and also keeps the toilet bowl filled

Scroll to Top